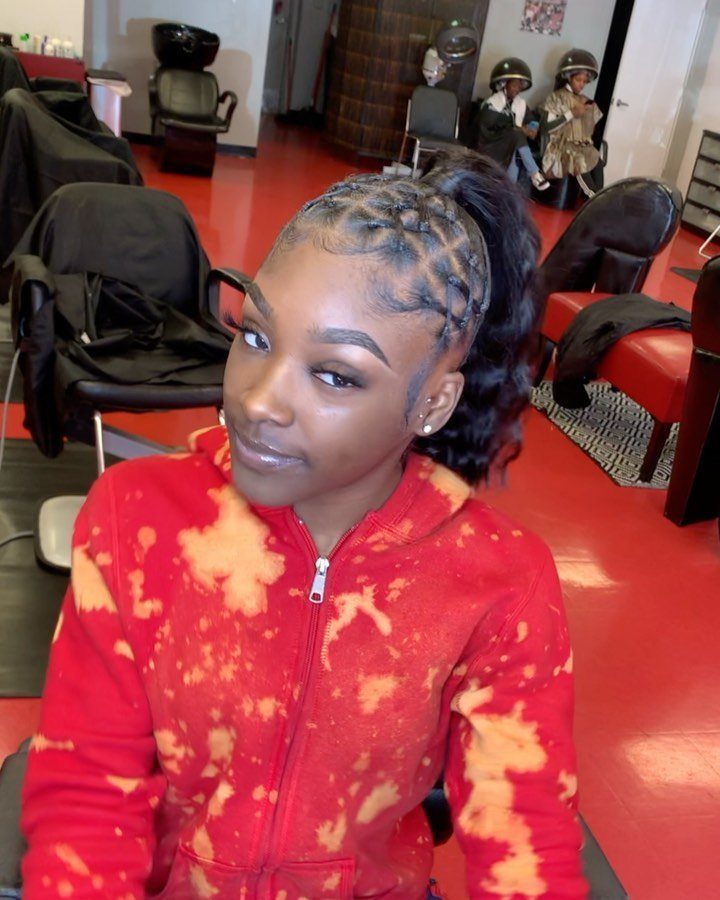
Hair texture and thickness decide which of these styles will hold, and they matter more than the pattern itself.
Straight or fine hair does well with the Criss-cross Ponytail and the Rubber Band Grid Ponytail, where extra bands add grip, while curls hold up better in Rubber Band Accent Braids or the High Curly Ponytail with Rubber Bands.
Effort runs from Rubber Band Pigtail Braids, which take 2 small bands, to the Rubber Band Grid Ponytail, which needs a rattail comb and extra time.
1. Criss-cross Ponytail with Rubber Bands
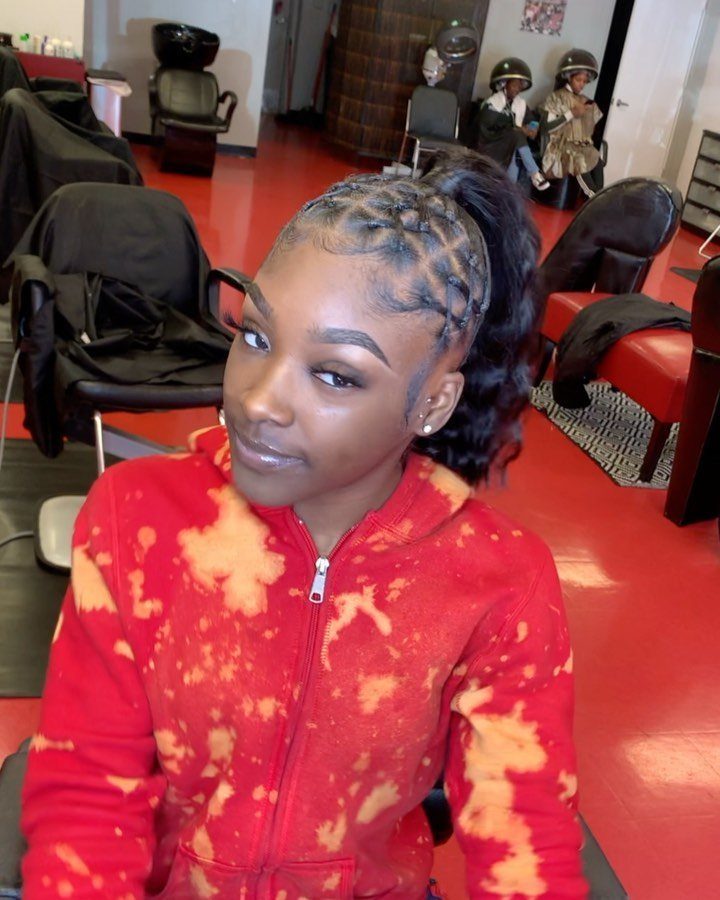
A criss-cross ponytail swaps the single straight band for a few small bands stacked down the length, with the hair crossing over itself between each one. The pattern reads as styled, yet it is still just a ponytail.
For hair that slips out of ordinary ponytails, the extra bands add grip.
Start with a smooth, high or mid ponytail, then split it in 2 and cross the halves before banding. Repeat down the length, using clear or color-matched bands for a quieter look.
2. Rubber Band Pigtail Braids
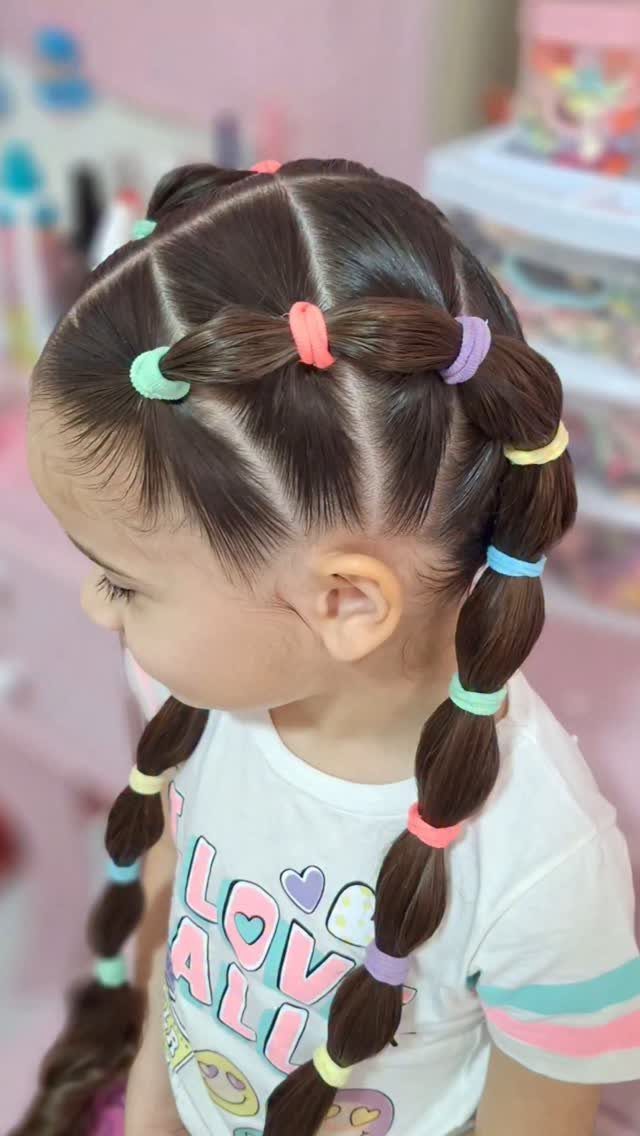
Pigtail braids with colorful bands at the ends are about as easy as a style gets: part down the middle, braid each side, and finish with a small band.
Bright bands do the decorating, so skip the ribbons.
A white tee and a pink backdrop will do the rest. Braid tightly enough to last through the day, but not so tight that it tugs at the scalp, especially on kids.
Use 2 bands per braid if the ends keep unraveling.
3. Rubber Band Accent Braids
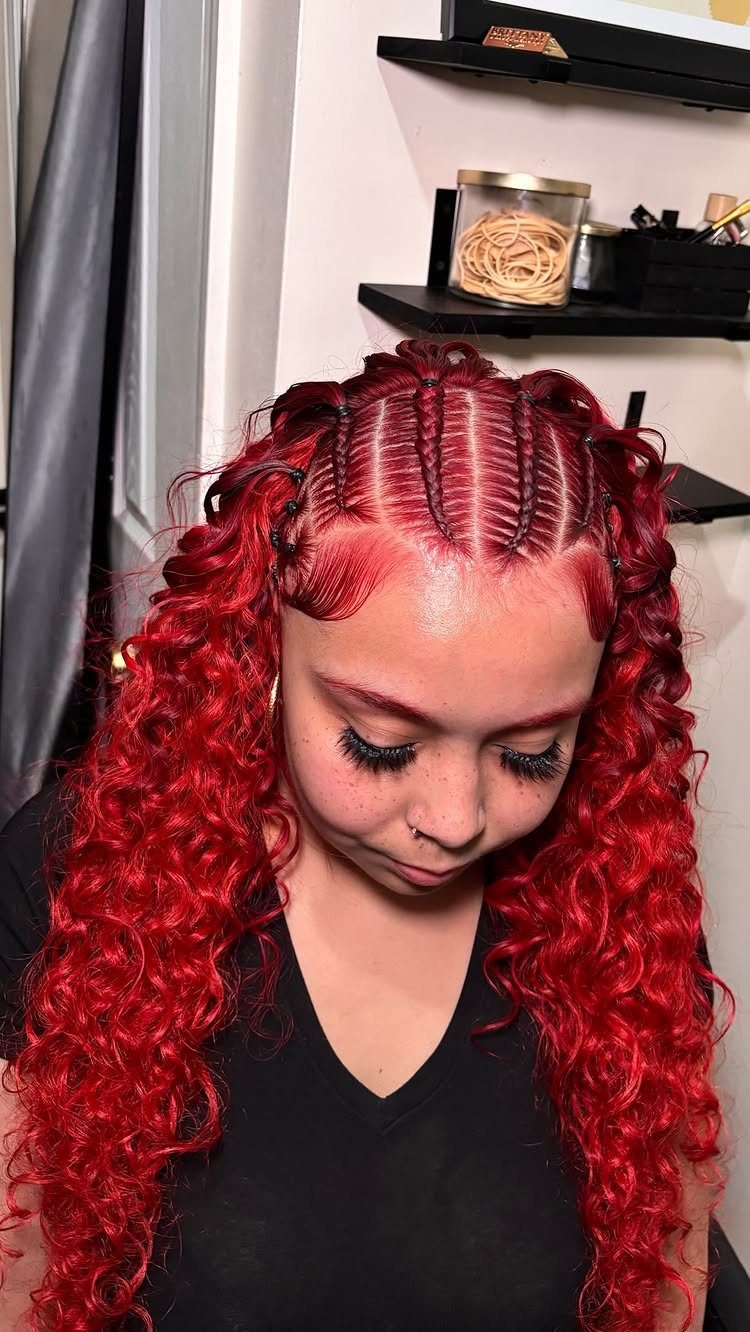
Loose curls look best with a little structure, and a few small braids across the top give it. Black bands keep the look sharp against bright color.
Section only the top, braid each piece close to the scalp, and tie off each braid with a small band.
Leave everything else down. The braids hold curls back from the face while the rest stays full.
Fewer, neater braids beat many messy ones.
4. Rubber Band Space Buns
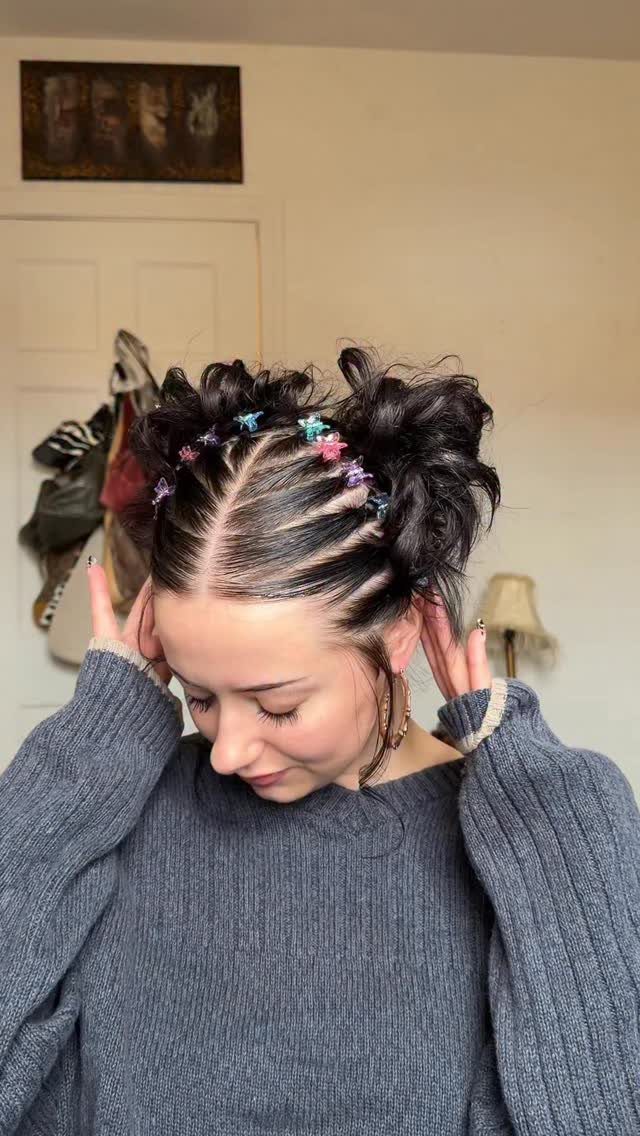
Space buns get a Y2K feel once small bands wrap the buns in a spiky, scattered pattern. Small clips tucked between the bands finish the look, so pin in a few for the full effect.
Start with a straight center part, then gather each side high on the head and secure it as its own ponytail.
Twist each one around its base, then wrap small bands over the bun to hold the shape. Star-shaped bands are a playful finish.
Keep the buns even in height, since a mismatch is the first thing anyone sees.
5. Bubble Pigtails with Rubber Bands
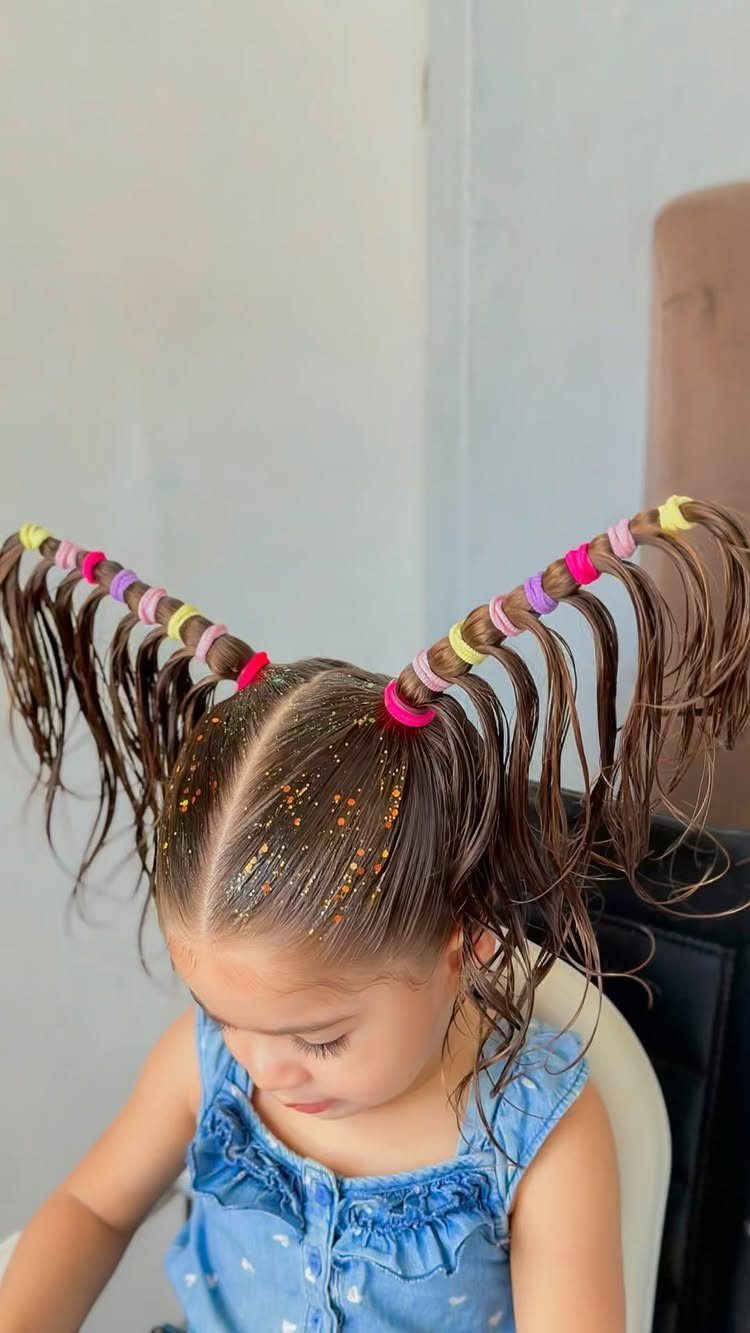
Bubble pigtails are high pigtails divided into rounded sections by small bands spaced down the length. Each gap puffs out into a bubble.
Make 2 high pigtails, then tie a band every couple of inches.
Gently pull the hair apart between bands to fluff each bubble. Colorful bands make this a good pick for kids, and the style survives play better than loose hair.
Bands snag on thin hair, so remove them by snipping gently rather than pulling.
6. Rubber Band Grid Ponytail
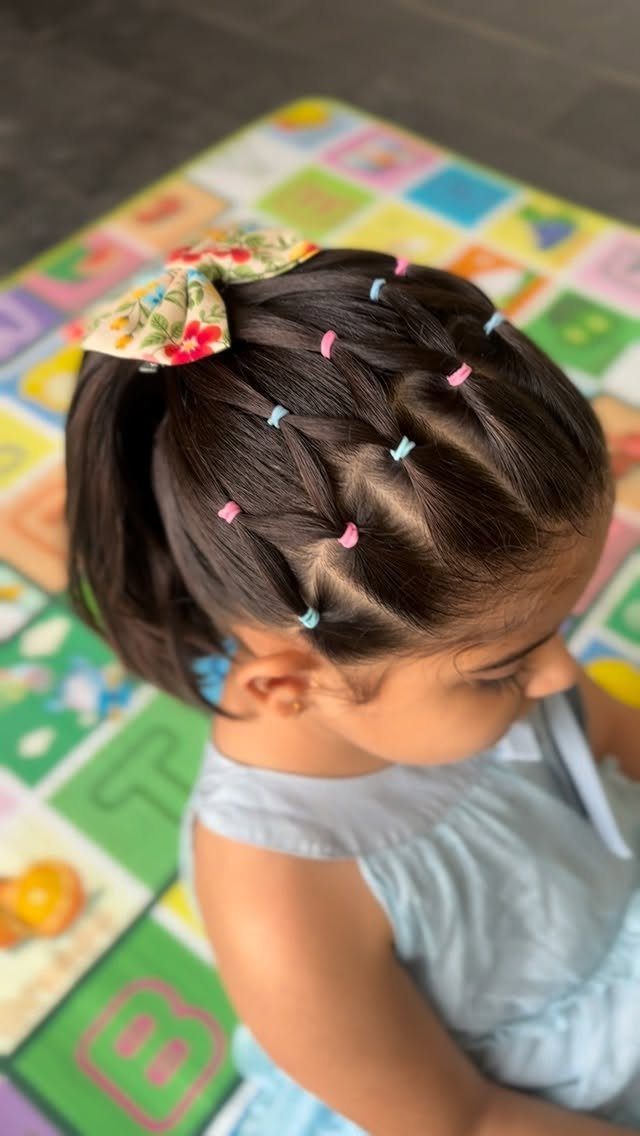
A grid ponytail uses small bands to box the hair into neat squares across the head before everything gathers into one ponytail. It takes patience, but the result looks precise.
A rattail comb makes the cleanest grid: draw the rows first, then split each row into squares and wrap a small band at the base of every one.
Gather all the banded sections into one ponytail at the crown, then tie a bow over the elastic; a floral one adds a soft contrast to the geometric rows. Choose bands in a few colors for a playful look.
Plan for extra time, and expect a squirmy child to test your patience on this one.
7. Sectioned Rubber Band Low Pigtails
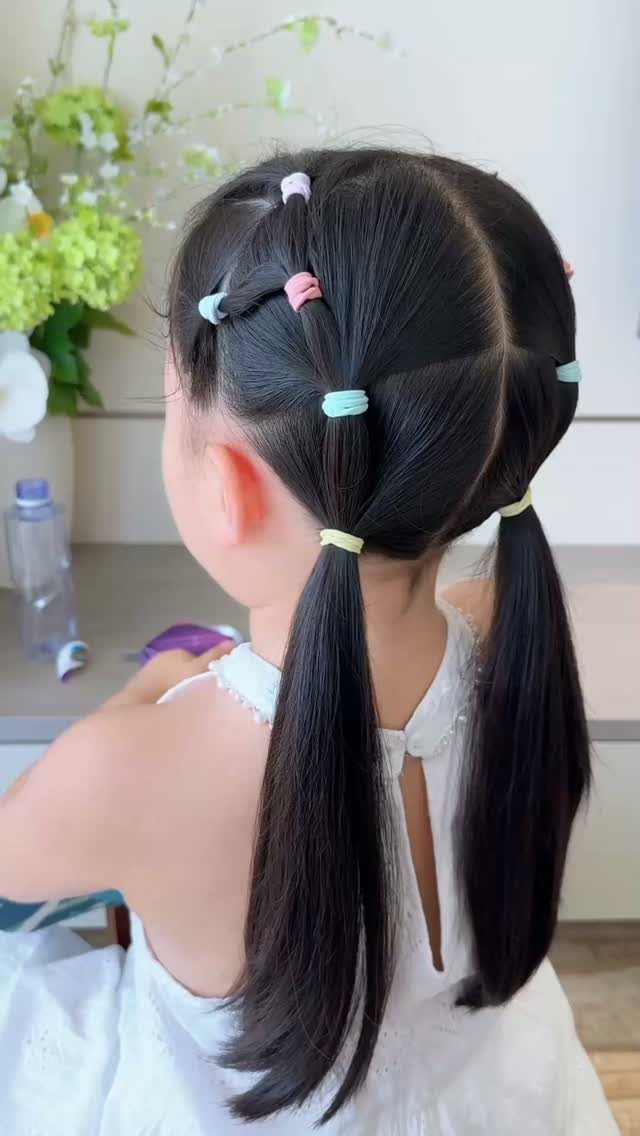
Sectioned low pigtails start at the scalp, with a band at the root of each small section and the hair running down into 2 low tails. Colorful bands do the decorating, so a plain outfit is enough.
Part the hair down the back, then clip it into even blocks and band each one close to the scalp.
Keep every section the same size, since uneven blocks are what the eye catches first. Gather the banded rows into the low pigtails at the end.
Allow extra time; the sectioning is the slow part.
8. High Curly Ponytail with Rubber Bands
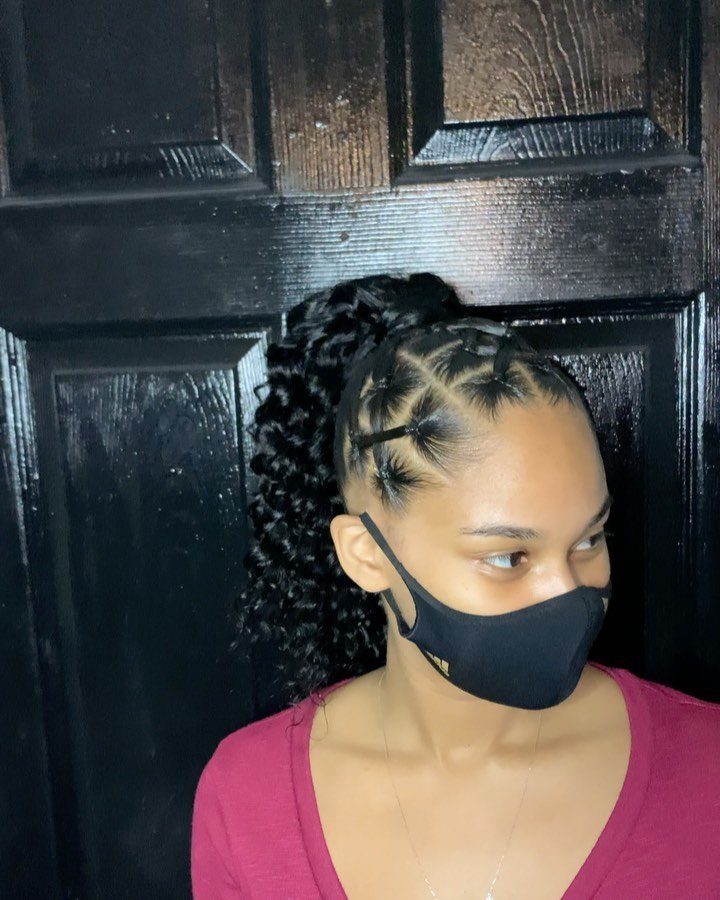
Curls and tiny bands pair well here: the front of the scalp stays sleek in banded sections, while the curls spring free in a high ponytail. Black bands blend into dark hair and keep the focus on the shape.
Band the front sections first, working back from the hairline.
Then gather everything high and secure it with a stronger elastic at the crown. Let the ponytail curls stay loose and full.
Sleek sections against full curls is the contrast I like most, so don’t brush the ponytail out.
9. Criss-cross Rubber Bands with Bows
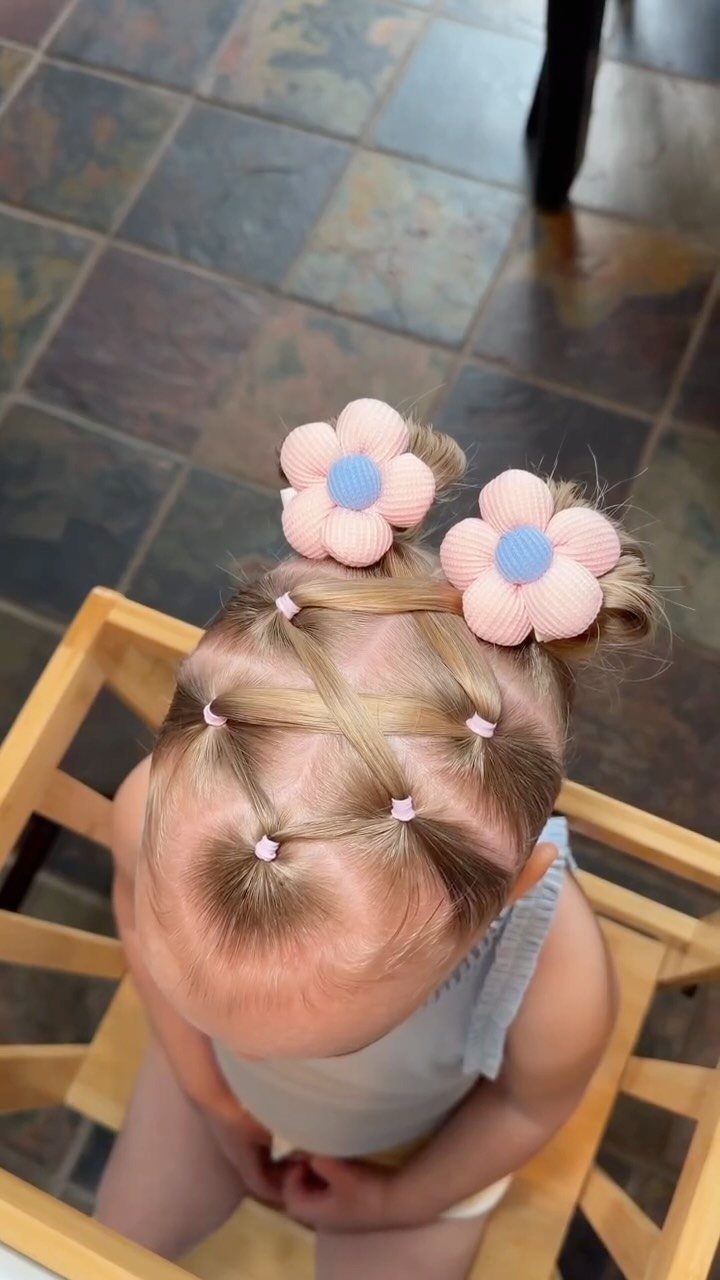
Bows make a criss-cross pattern look finished. Small bands cross over the top of the head in a diamond pattern, and two large flower bows sit on either side to frame it.
Use a rattail comb to part the diamonds cleanly, then band each crossing.
Match the band color to the bows; pink on pink reads as one deliberate idea. Clip the bows on last, so they don’t get in the way of the banding.
Large bows slip on fine hair, so anchor each one over a band.
10. Criss-cross Side Rubber Band Pattern
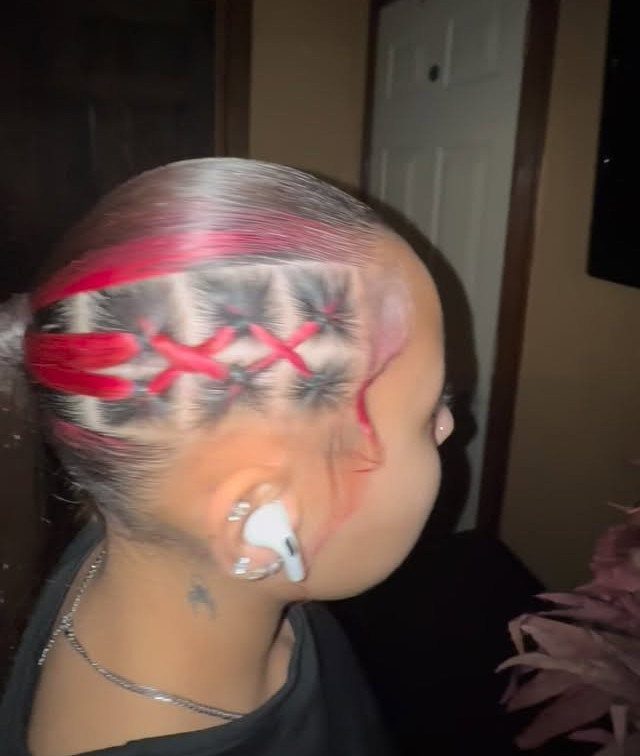
Moving the criss-cross to the side of the head turns a simple band pattern into a graphic detail. The rows run along one side, and the rest of the hair stays loose.
Comb a clean side section, then divide it into rows.
Band the points where the lines cross. Small bands in a color pulled from the hair look intentional, and a contrasting shade makes the geometry louder.
Keep the section narrow; a wide panel is harder to keep neat.
Using Rubber Bands Safely
Little rubber bands won’t wreck your hair on their own; the damage comes from how tight you pull them, how long they stay in and how you take them out.
Soft, snag-free bands cause far less breakage than the thick, rough ones that grab strands.
Skip sleeping in them. Bands left overnight tug as you shift on the pillow, and removing them in the morning is when most damage happens.
Keep each band loose enough that you can slide a fingertip underneath. If the scalp feels pulled, redo it.
With very thick hair, place the detailed banding lower down the back. The weight pulls less there, and the pattern is easier to build.
Choosing Rubber Bands
Color is the easiest way to make a band pattern look planned. Pull a shade from your outfit, and the bands read as part of it rather than as an afterthought.
Bands come in several sizes and styles, so match them to the job. Smaller bands suit fine detail work and neat sections, while larger ones hold heavier hair.
Buy a mixed pack first. You’ll learn quickly which size and color you reach for most, and which ones disappear into your hair.
If you’re unsure, pick a neutral shade that sits close to your hair color. Then add one bright accent band for contrast.
Styling Tips for Rubber Band Hairstyles
Symmetry is optional. Let each section of hair carry its own pattern, and the result often looks more interesting than a mirrored version.
Change the size, angle or number of sections and see what happens. A small shift in where you place a band can change the whole shape.
Intricate designs take practice, so rehearse on a day with nowhere to be. The second attempt is almost always cleaner than the first, because your hands learn the section sizes.
Work in a good mirror, and use clips to hold finished sections out of the way while you build the next one.
Frequently Asked Questions
What are some cute hairstyles that use small rubber bands?
Bubble pigtails, criss-cross ponytails and space buns are three of my favorites.
For bubble pigtails, set two high pigtails, add a small band every 2 inches or so down each length, then tug the hair gently between the bands until it puffs into round sections.
What does putting your hair in rubber bands do?
It gives hair structure, so sections hold a neat shape like squares, diamonds or puffed bubbles.
Small bands also add grip, which helps when hair slips out of an ordinary ponytail. Bands that are too tight or removed roughly can tug and break hair, so use soft, snag-free ones.
Are little rubber bands bad for your hair?
Not on their own. The damage comes from pulling them too tight, leaving them in too long and yanking them out.
To keep the hair safe, leave enough slack that a fingertip slips under each band, take them out before bed, and cut them with small scissors or snips rather than yanking them free.