Time in the chair separates these styles: a bubble braid or pancaked braid is a home project with elastics and patience, while large knotless braids can take most of a day at a braider’s.
Between those poles sit cornrow patterns that depend on clean, even parts, so a saved photo of the exact pattern does more than any description.
1. Braided Ponytail
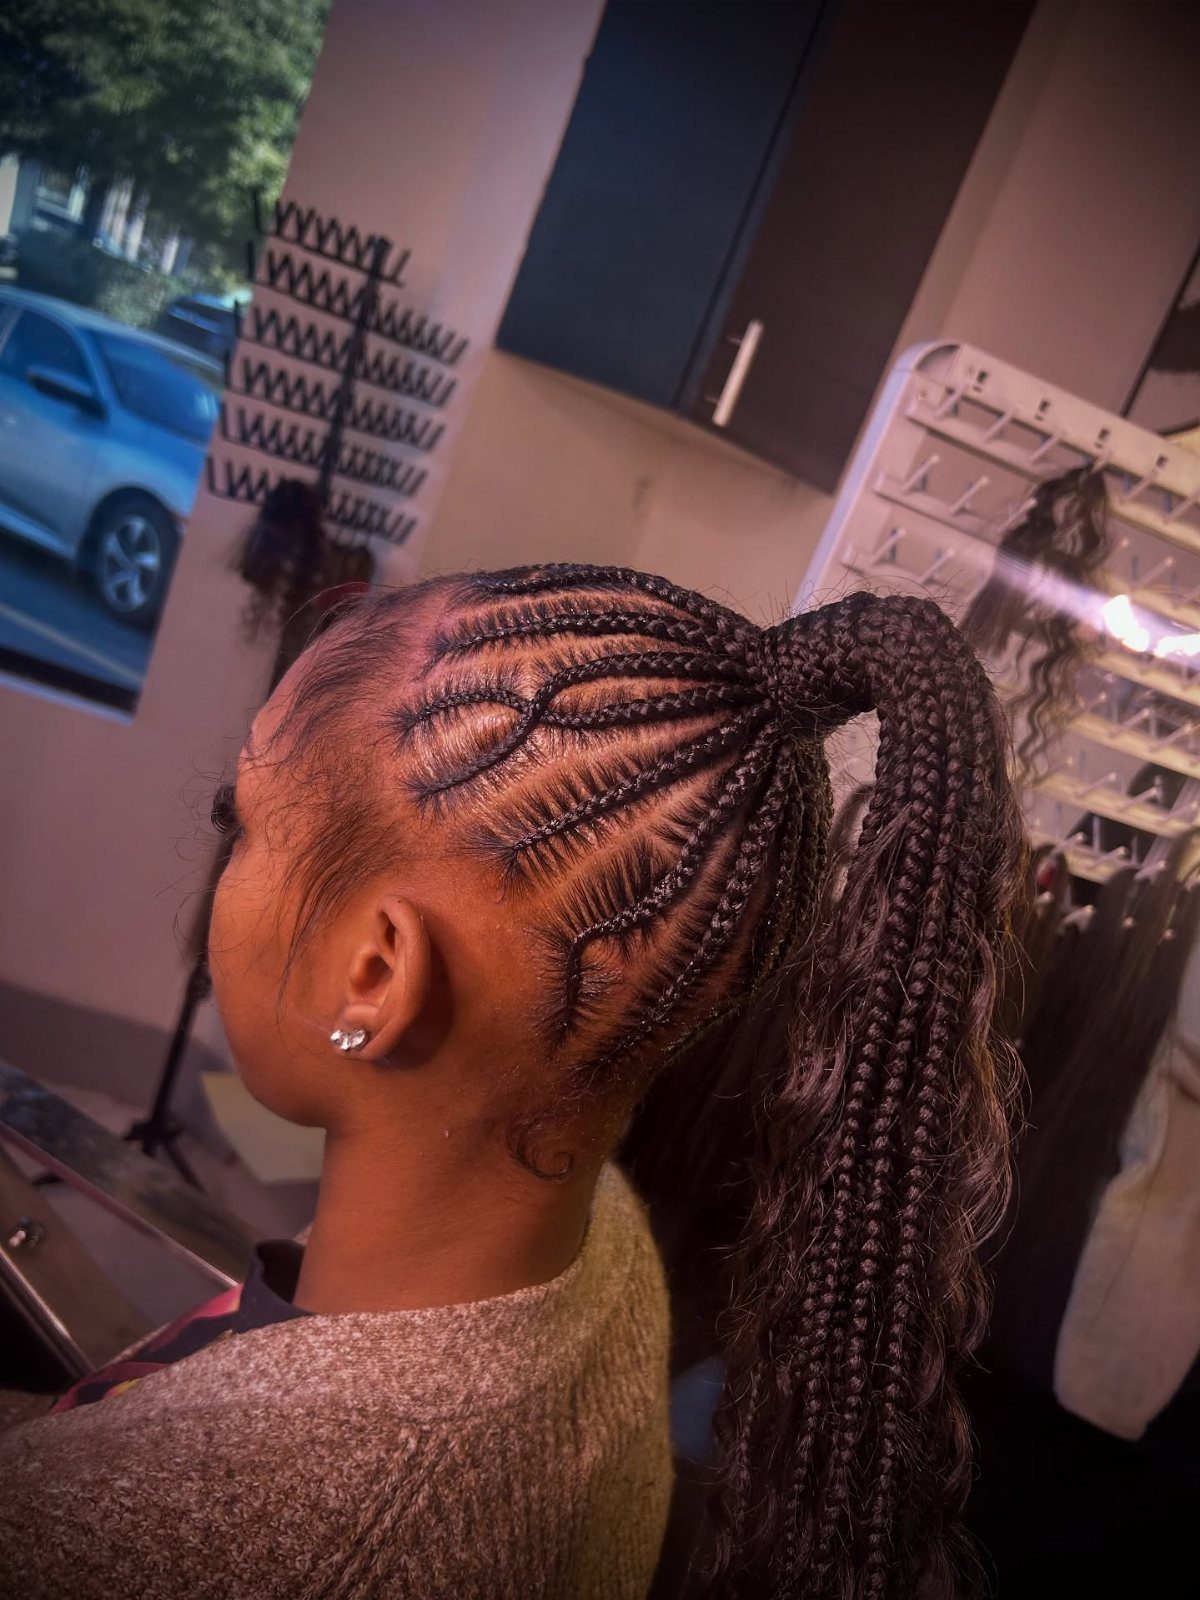
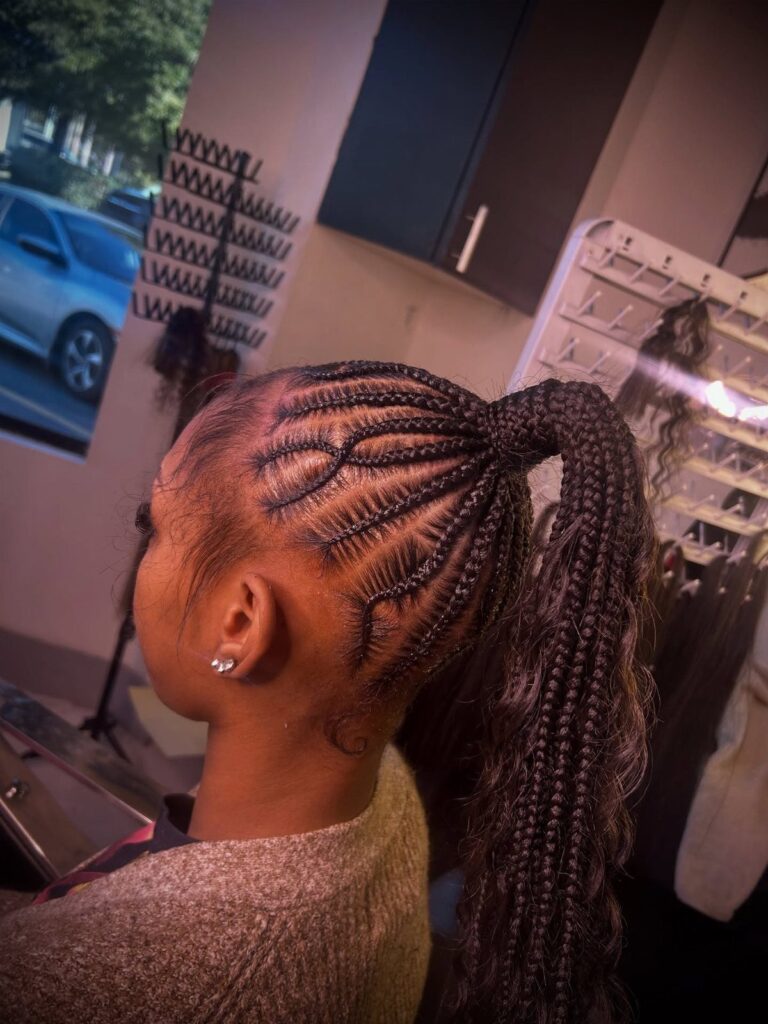
Cornrows laid flat across the scalp, then swept up into one high ponytail of long braids: that combination does the work of two styles at once.
The scalp pattern gives you a finished look from the front, and the ponytail keeps all that weight off your neck.
Thick hair holds a sharp cornrow line well, so I’d spend the effort on clean, even parts. Ask for the pattern by name, with a photo, so your braider knows how intricate you want it.
2. Large Knotless Braids
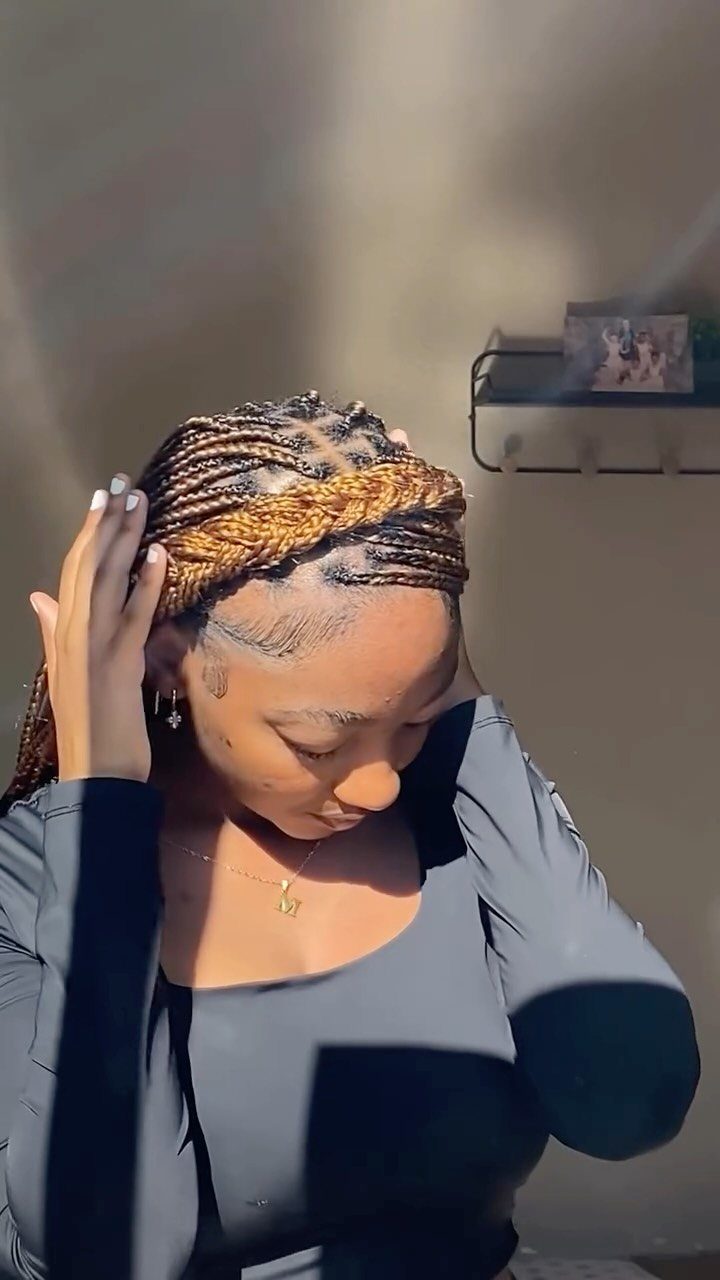
Large knotless braids start with a feeding technique: the braider adds extra hair gradually as each braid grows, so the root begins with your own hair and no knot.
That tends to feel lighter on the scalp than a bulky base.
For thick hair, I like going large.
Fewer, bigger sections mean fewer parts to maintain, and the braids look bold. A braided headband is an easy add-on if you want the front to look finished, and on thick hair it sits flat without any extra pins.
3. Bubble Braid
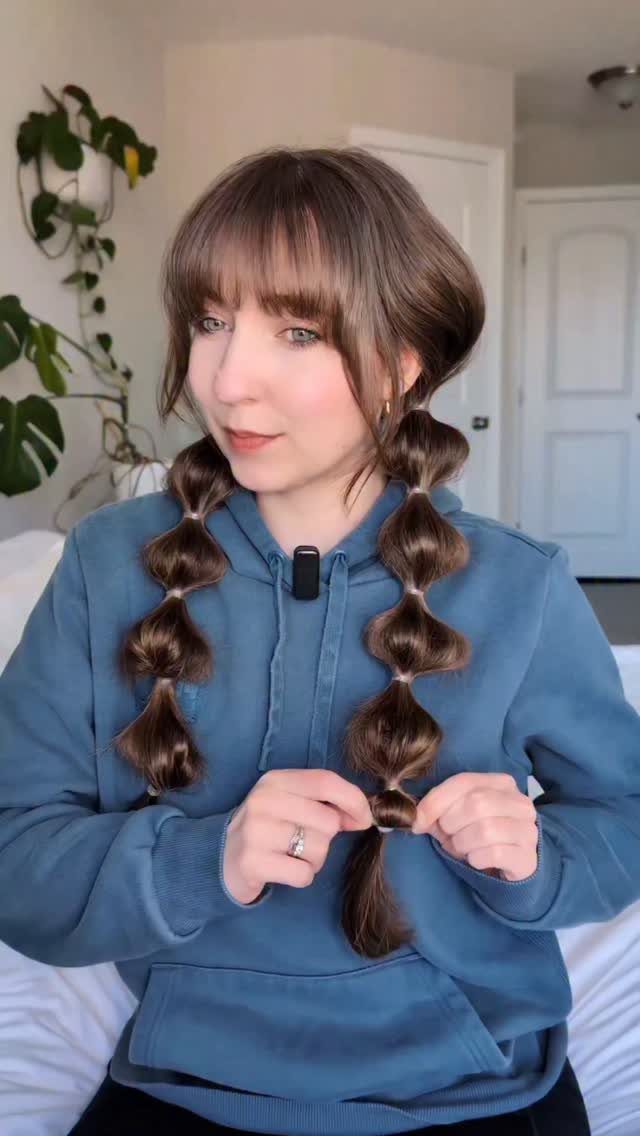
2 bubble braids make the easiest home project on this list. Secure a ponytail with elastics at intervals, then gently tug each section outward so it puffs between the bands.
Thick hair has a built-in advantage: the bubbles fill out fast and hold their shape.
Use small clear elastics so they disappear into the hair. Bangs make the look read as playful without much effort, and they soften the stacked, rounded shape of the bubbles.
4. Criss-Cross Goddess Braids
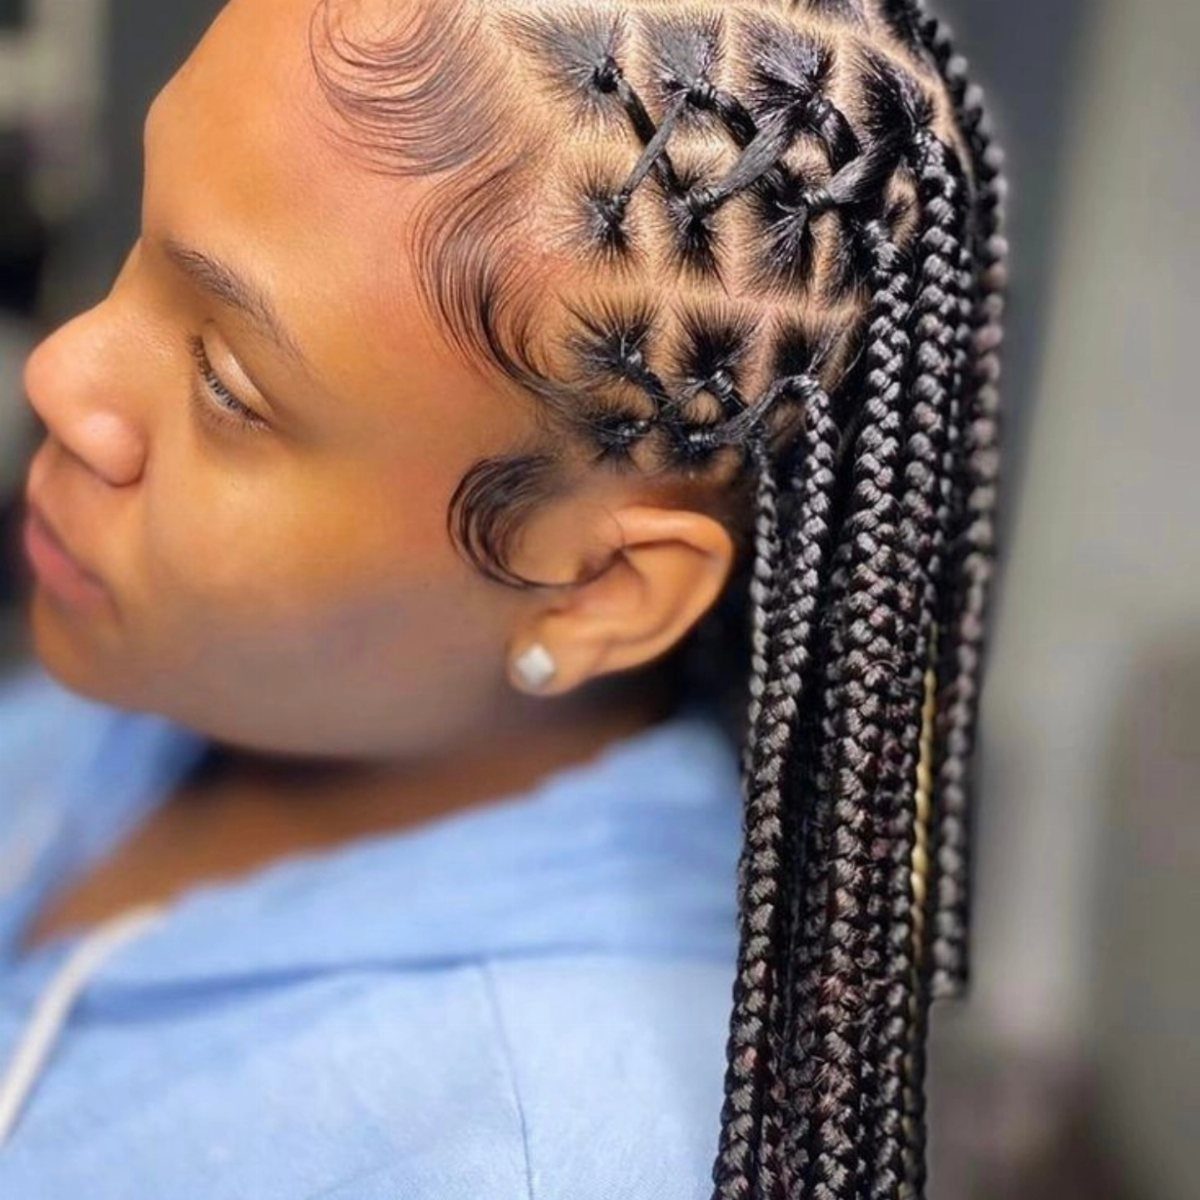
Chunky cornrows that cross over each other make a protective style with real structure. Because the hair is tucked into braids, it stays out of the way, and the criss-cross pattern gives the scalp a graphic look.
Long extensions at the ends add length and weight.
I’d choose this when I want something dramatic that still sits close to the head. Bring a clear photo to your braider, since the crossing pattern is easy to misread when described.
5. Fishtail Braid
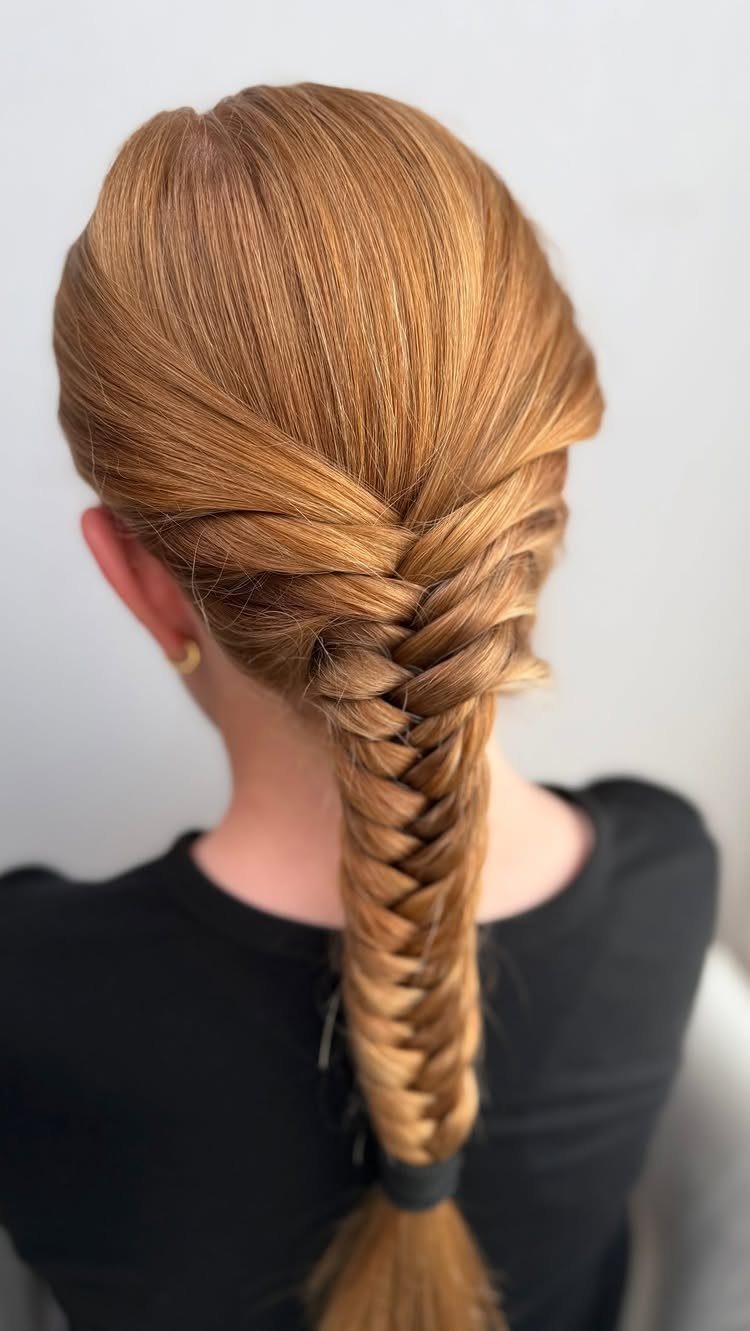
A fishtail braid looks complicated and isn’t. Split the hair into two sections, take a small strand from the outer edge of one side, cross it over to join the other side, then repeat on alternate sides down the length.
Thick hair makes the woven pattern look full and dense, though it takes longer because there’s more hair to work through.
Smaller strands give a tighter, more detailed weave. Work on slightly textured hair for better grip.
6. Bohemian Braids
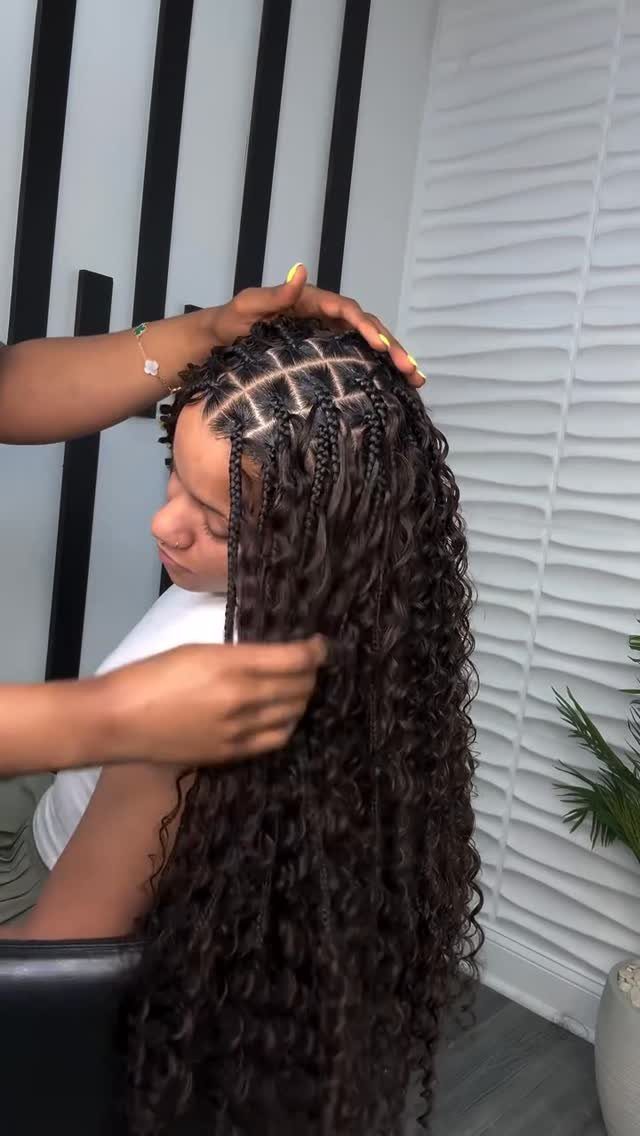
The mix of tidy and wild is the whole appeal, and it reads as relaxed in any season.
For thick hair, I’d ask for the curls to be added generously so the braids don’t look sparse next to your natural volume.
Expect a long appointment, since each braid is done individually. Take a reference photo so the curl amount matches what you want.
7. Long Goddess Braids
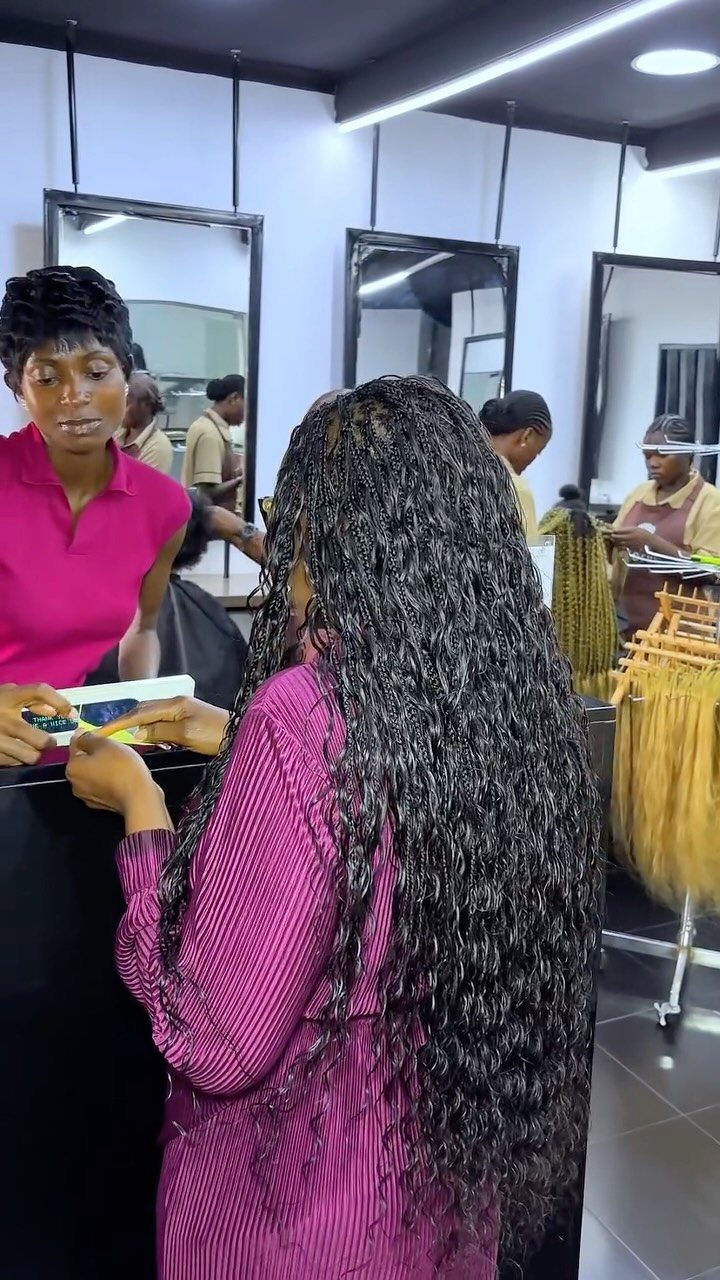
Waist-length goddess braids with curly ends are a commitment in weight, and thick hair carries that weight better than most. The curls at the tips keep the long lines from looking stiff.
I’d ask for the braids to be sized to match your natural density, so the scalp doesn’t show through between sections.
Bring a photo of the length you want, since "long" means something different to every braider. Plan on a long appointment.
8. Cornrow Bun Updo
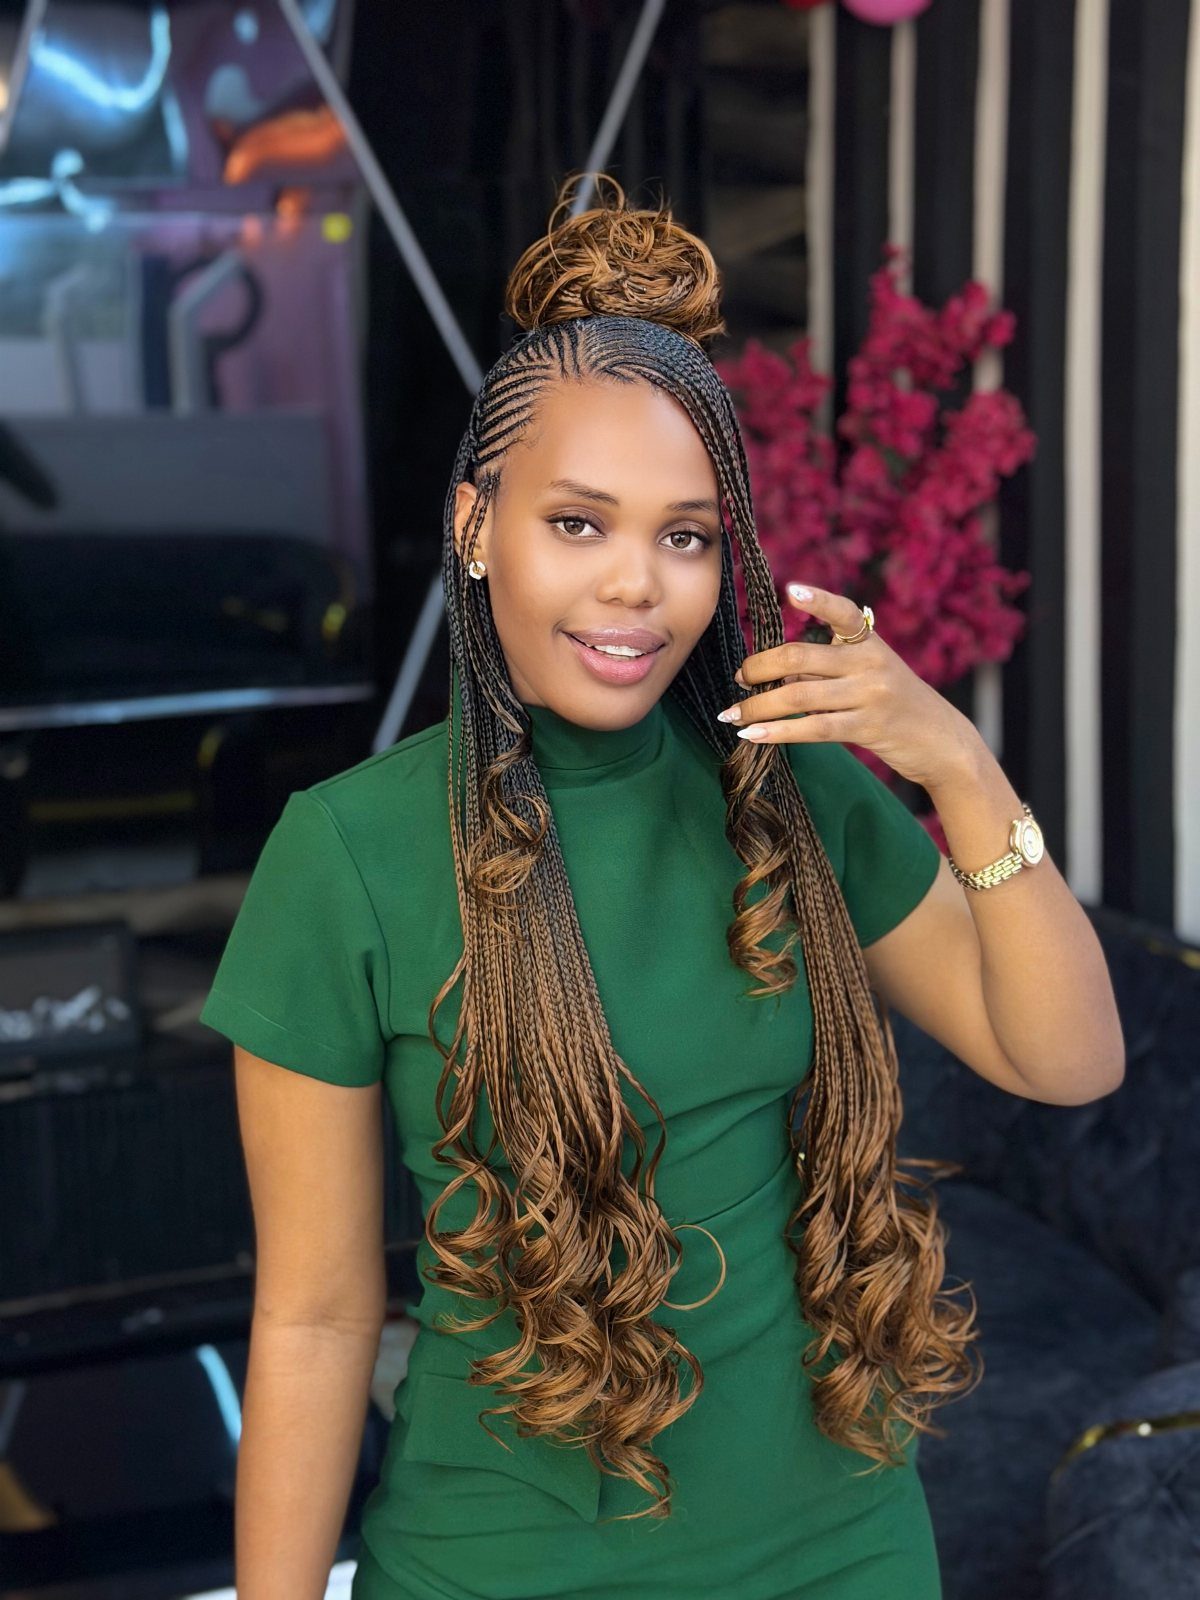
A side-positioned bun built from cornrows gives the style a shape you can see from every angle, with long curls trailing below it.
Thick hair is an asset here: the bun comes out full without padding.
I’d keep the cornrows neat and even so the bun is the only loose, voluminous part. Ask your braider where the bun should sit, and show a photo, because a side placement changes how the whole pattern runs.
9. Design Stitch Braids
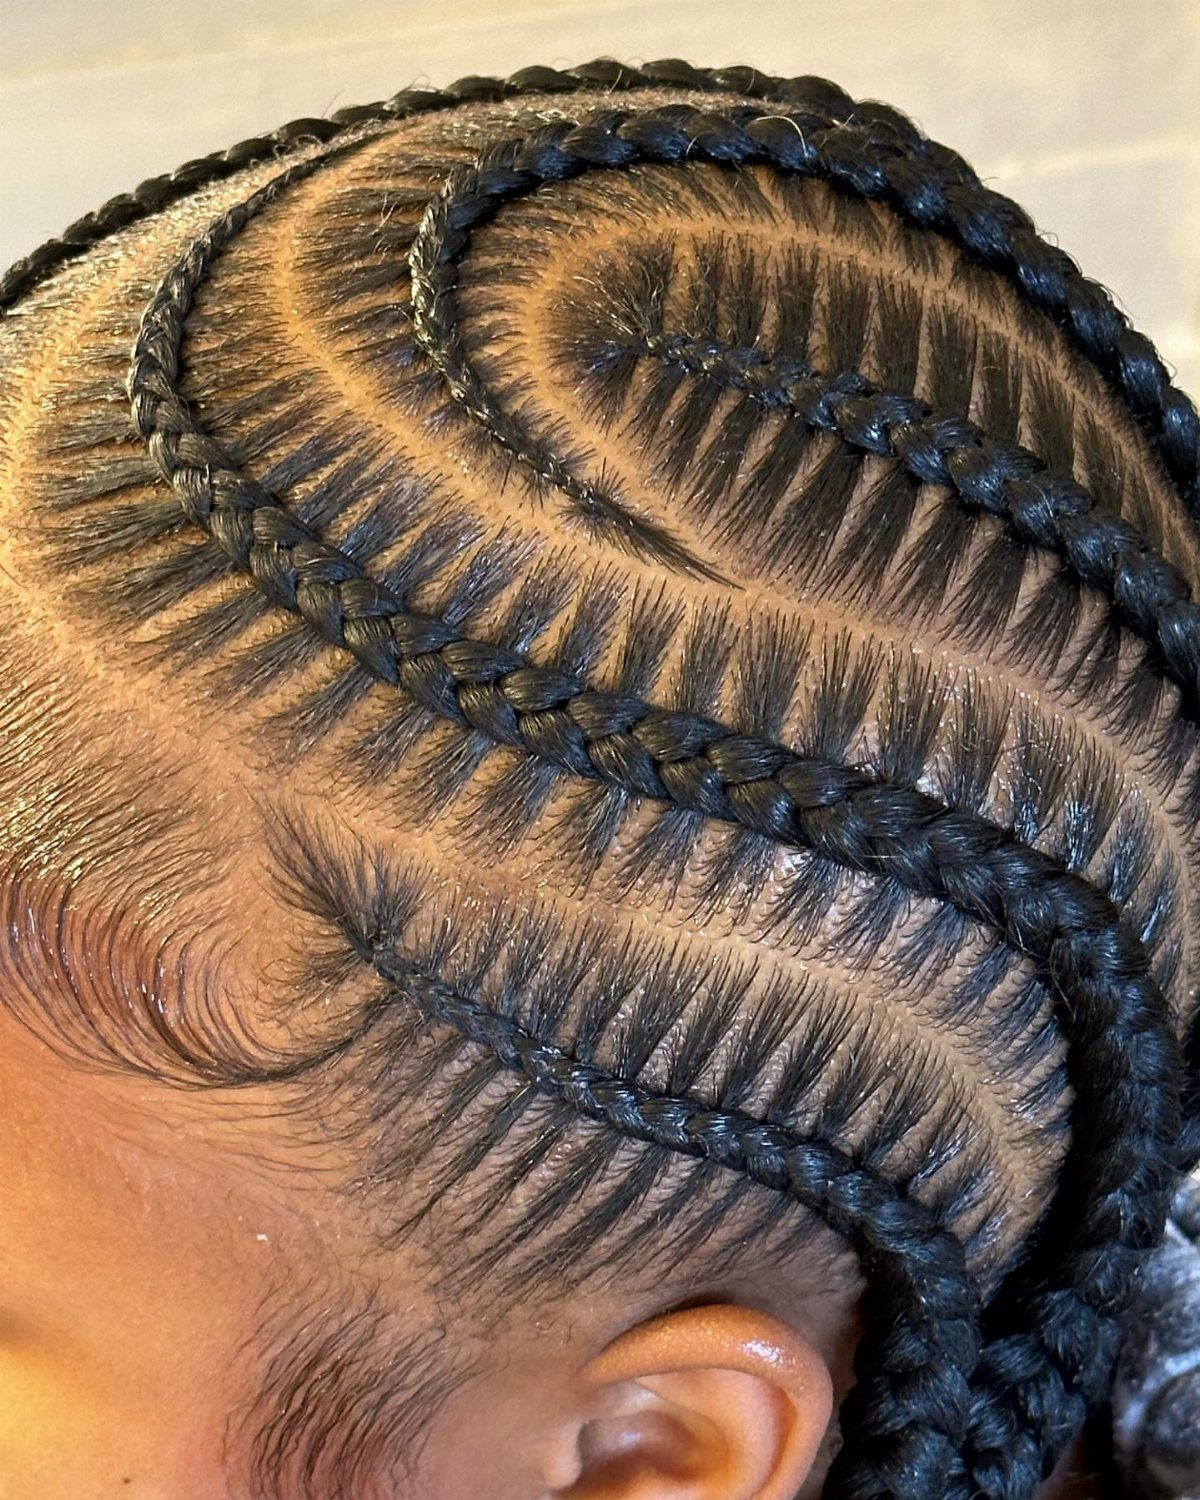
Design stitch braids are cornrows with curved, precisely parted lines, finished with styled edges. The parting is the whole look, so crisp lines matter more than length.
For thick hair, I’d ask for slightly larger sections so the curves stay clean and the braids don’t pull. Show your braider a photo of the exact pattern, since curved parts are hard to explain in words.
Edges are the finishing detail, so ask for them to be laid at the end.
According to Pinterest, the search for ‘big braids hairstyles’ is up by 30 percent, with many looking to try more statement braids like the design stitch braids.
— PureWow
10. Long Braided Faux Hawk
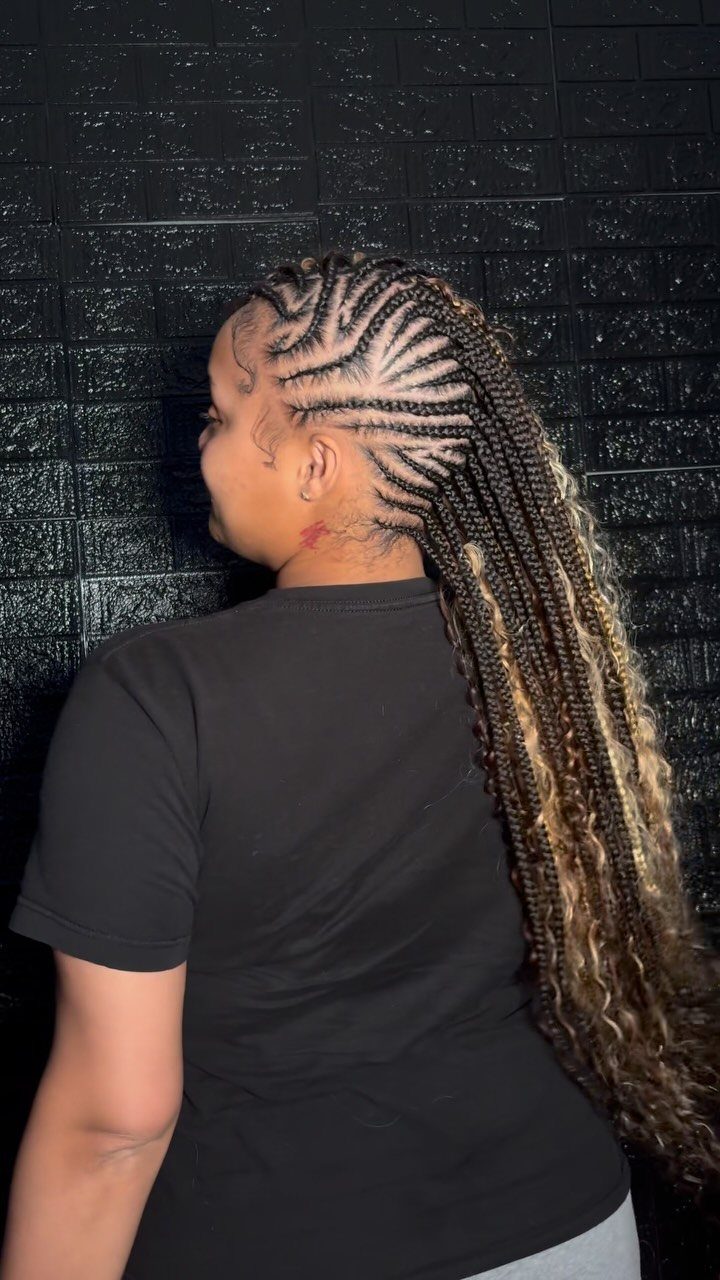
Cornrows that curve up into a long braided faux hawk combine flat braiding at the sides with length down the center. You can adjust the thickness, the length and the overall shape to suit your taste.
Thick hair fills the center section well and gives the hawk presence.
I’d choose this if you want a bold look that keeps the sides tidy. Blonde tips are a separate option for adding contrast; skip them if you want a quieter style.
11. Senegalese Twists
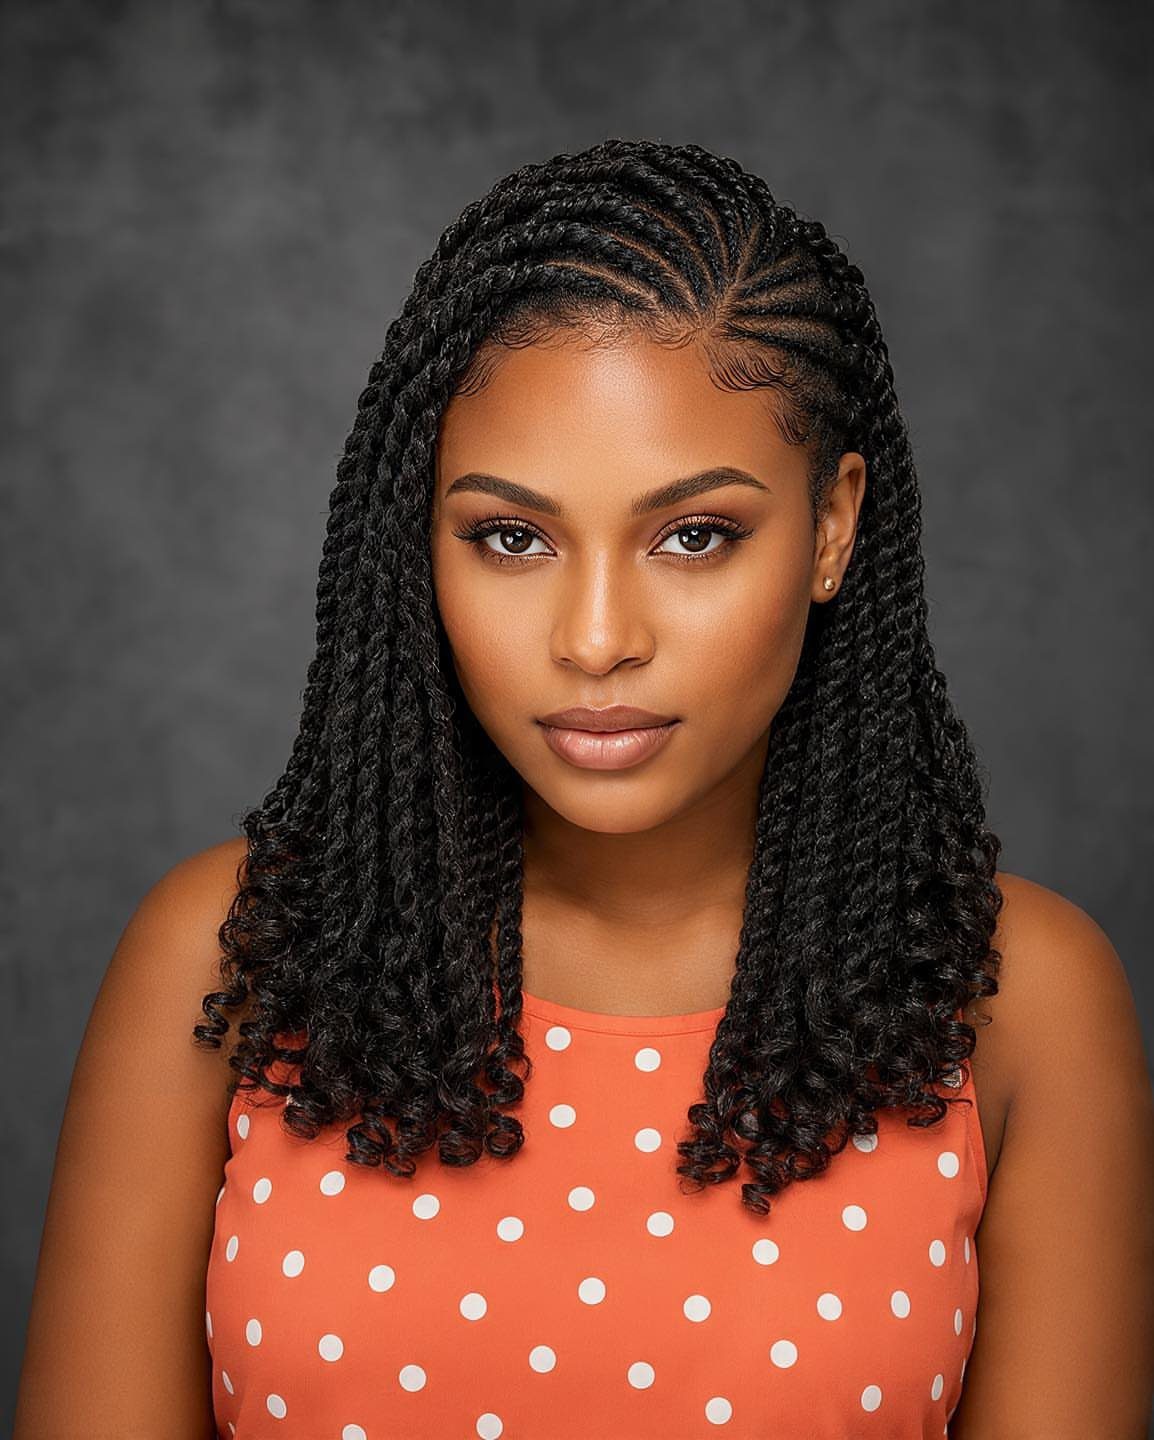
Senegalese twists are two-strand twists, sleek and long, and here they sit with a row of cornrows at the front. The result is polished and smooth.
On thick hair, I’d go for medium-sized twists so the weight stays comfortable and the parts stay even.
Bring a reference photo to your braider and say how much of the front you want in cornrows. Block out most of a day for the chair, because every twist gets wrapped by hand, one section at a time.
12. Dynamic Side-Swept Cornrows
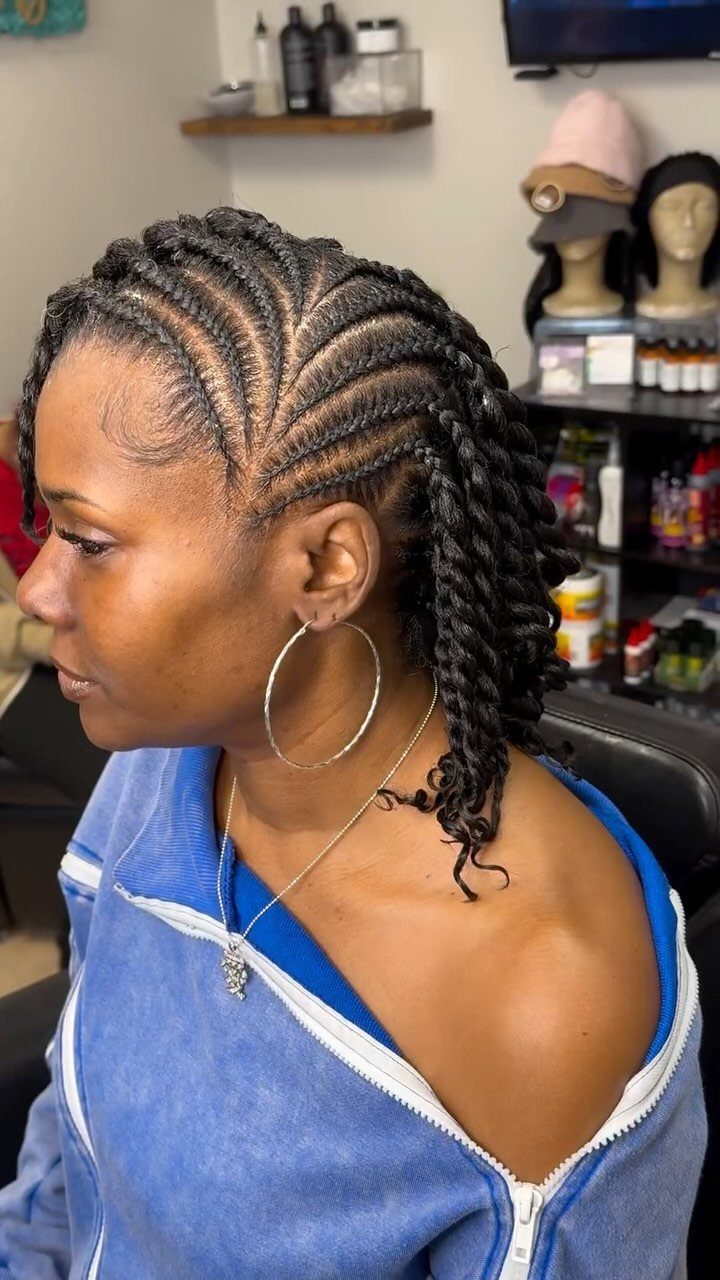
Cornrows that sweep to one side and finish in twists give you a flowing, directional style with lots of room for personal touches.
Thick hair holds the curved lines well and makes the sweep look full.
I’d ask for a clear parting pattern and show a photo, since the direction of the curve is what makes the style. Hoop earrings show off a side-swept shape nicely, so wear them if your ears are visible.
13. Pancaked Braids
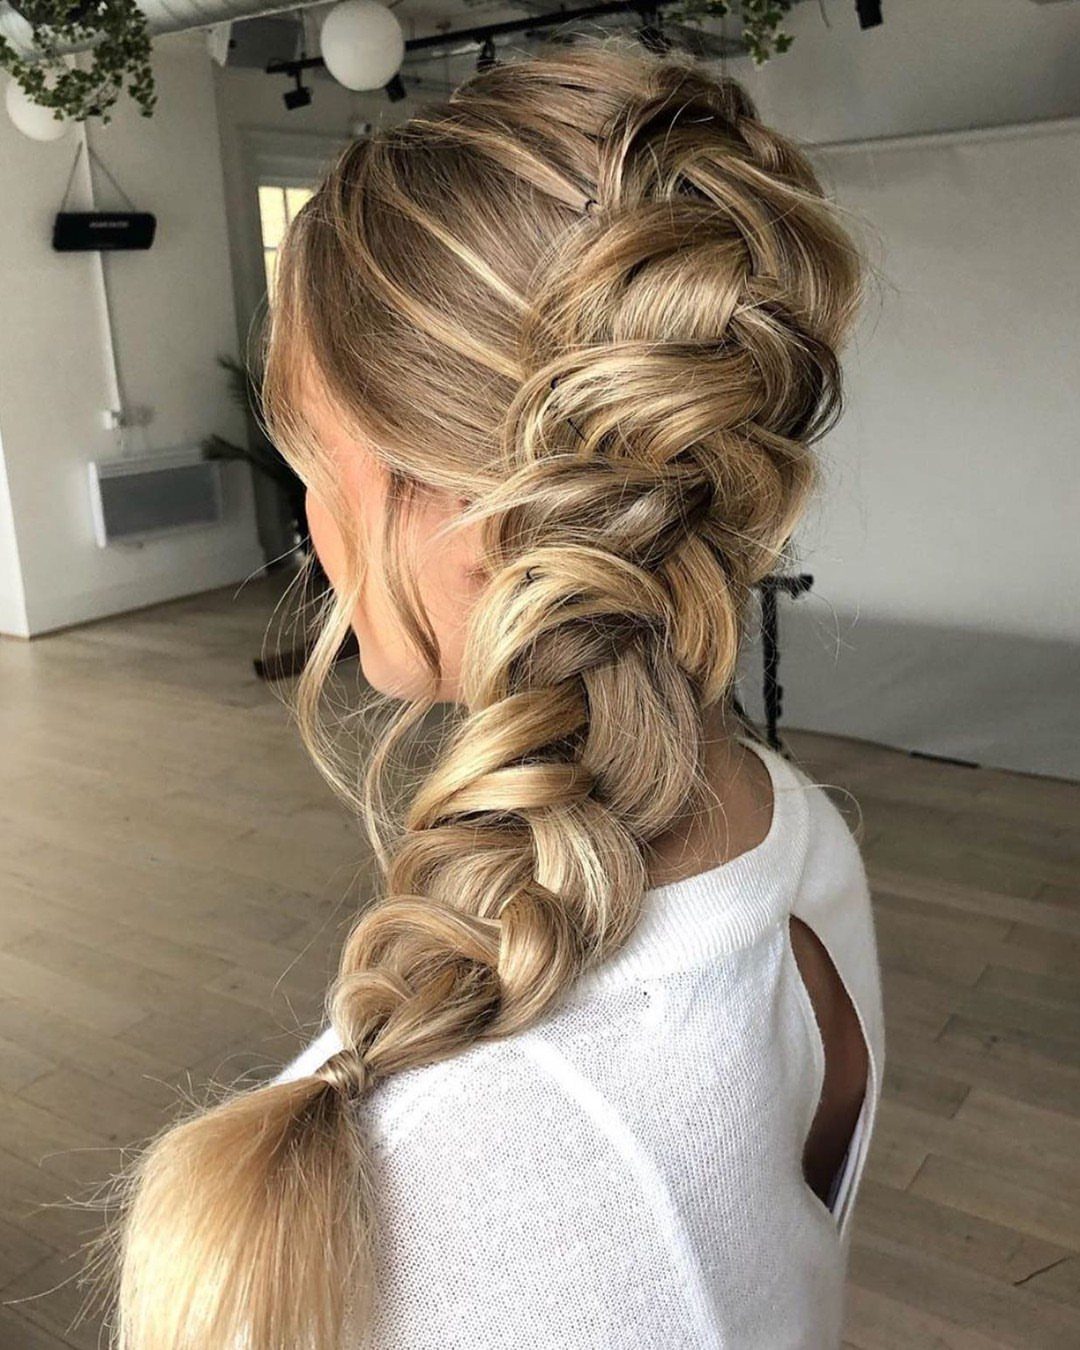
A pancaked braid starts as an ordinary braid, then gets pulled apart: tug the outer loops of each section sideways until the plait widens into a soft, flat ribbon.
Thick hair is where this works best, since the braid already has body and the loosened loops fill out without much coaxing.
Braid it fairly tight first, secure the end with an elastic, and pull gently, one loop at a time, working from the bottom up. Pulling hard at the top can unravel the whole thing.
Blonde or light hair shows the layered texture well, though any color works.
14. Geometric Feed-In Braids
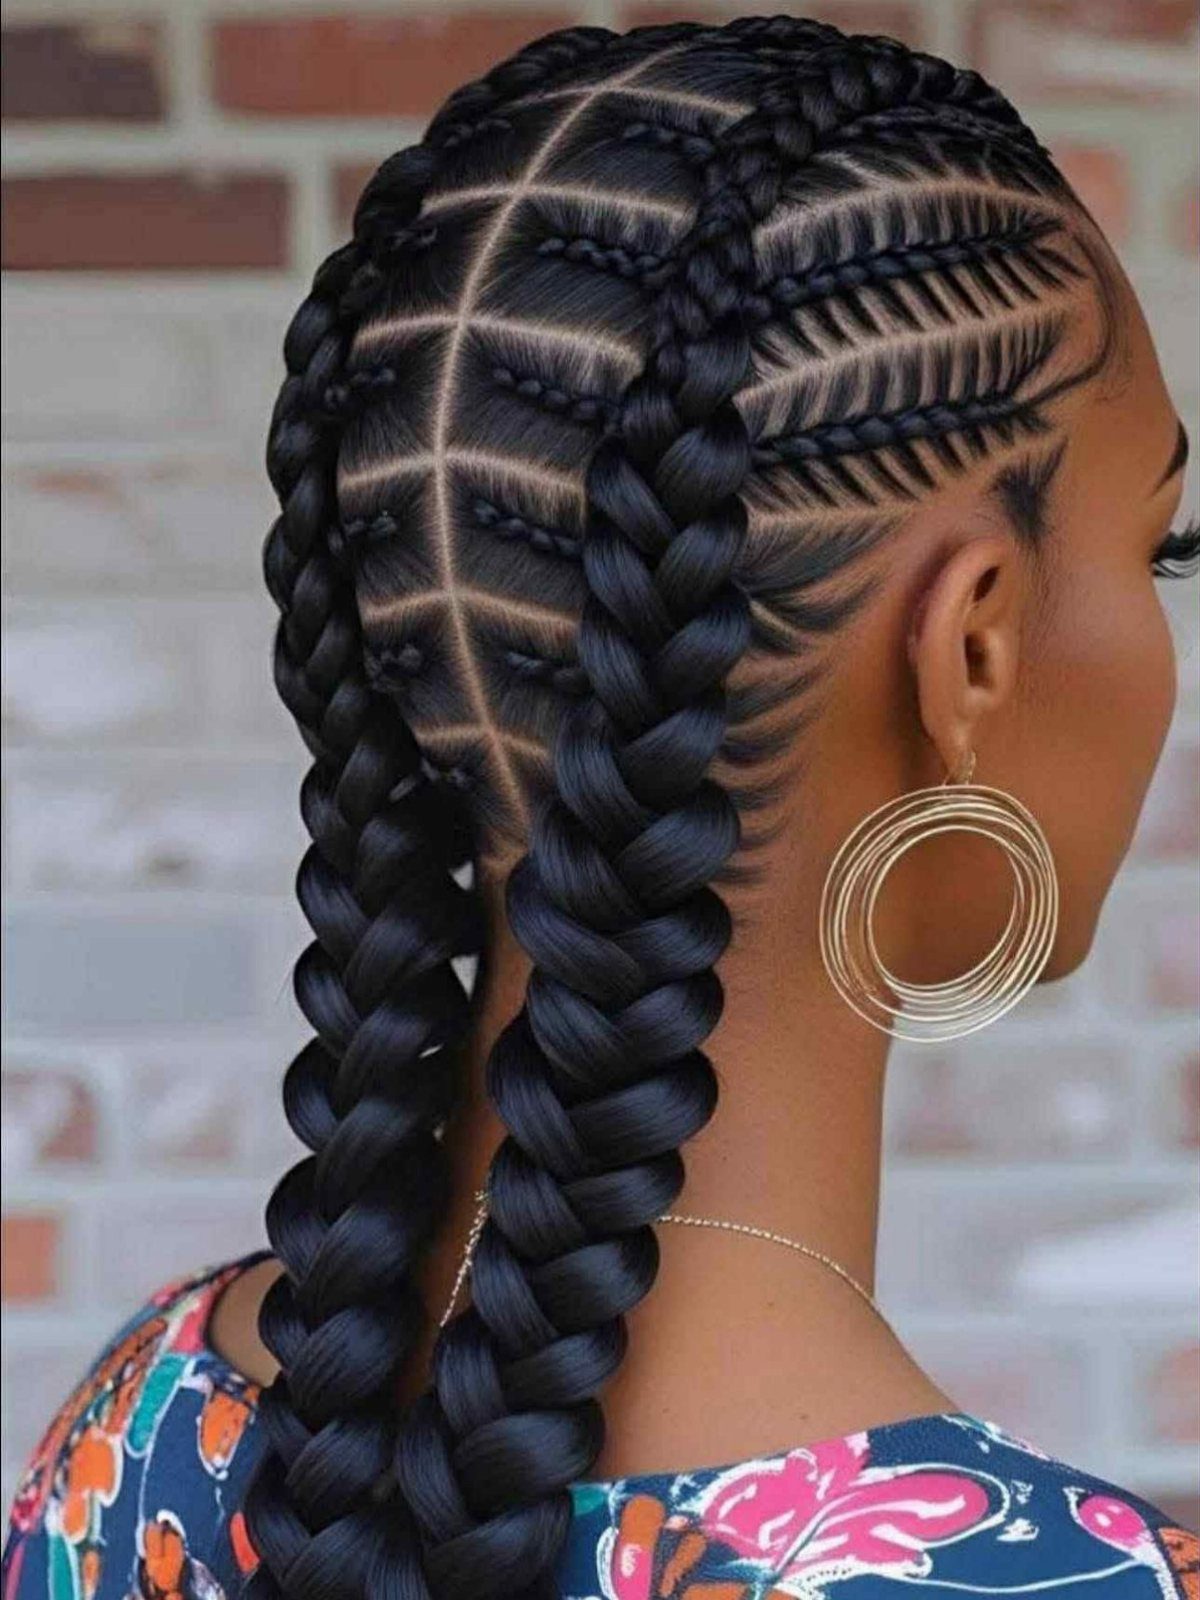
Geometric feed-in braids pair precise scalp work with a relaxed finish: angled and boxed cornrow lines on top, then 2 thick plaits hanging down.
Feed-in means the braider adds hair gradually along each row, so the lines start slim at the hairline and look natural.
Thick hair holds those sharp parts well. A saved photo of the exact parting pattern does more at the salon than any description, because boxes and sharp angles are hard to put into words.
Gold hoops suit the sharp lines nicely, and the 2 plaits keep the weight evenly balanced on both sides.
15. Half-Braided Crown with Curls
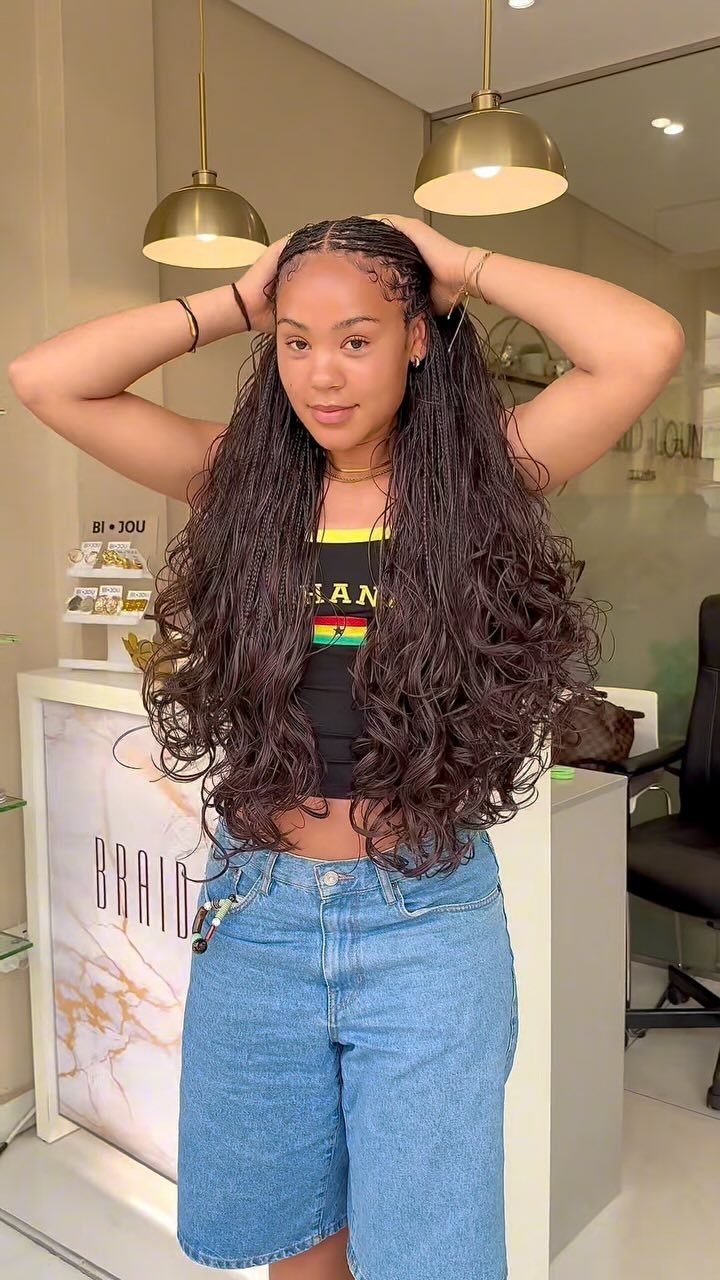
Small braids set around the crown while the rest of the hair stays loose and curly: that split gives you structure on top and natural volume below.
Thick curls pair well with it because the braids hold the front and sides back without flattening the curl pattern.
Keep the braids small so they stay neat against the fuller curls. Define the loose section with your usual curl routine before you braid, or the contrast will look uneven.
It’s an easy style to ask a braider for by name, with a photo.
Choosing Braid Styles
Pick a braid for what it does to your scalp as much as for how it looks.
Tension is the thing to watch: if the roots feel pulled or sore the first night, the style is too tight, and it’s worth asking your braider to loosen it.
Moisture matters just as much. Choose a style that lets you reach your scalp and hair with a light product, and that keeps your ends tucked in rather than rubbing on clothing.
If you can’t decide between 2 looks, try a preview app or a photo edit on your own selfie before you book. Seeing a style on your face shape saves a lot of regret.
Using Hair Extensions
Extensions are what make braids look thicker and longer, and you can use them at home or in a salon.
For a quick home braid, clip them in first, then brush everything out so there are no tangles before you start.
Large sections get a strong hold gel first.
Check your length before you book. A stylist quoted in my research says you need at least 3 inches of hair to install knotless braids properly, though any hair type and density can wear them.
Maintenance Tips
Thick hair under a braid dries out fast, so a light oil on the scalp and a leave-in on the lengths every 2–3 days keeps the plaits from turning brittle.
Braids keep hair tucked away, but dry roots and ends still break, and a dry scalp gets itchy long before the style is ready to come out.
I’d reach for a light product and apply it directly to the scalp and along the length, rather than piling on heavy cream that builds up between the parts.
Keep tension in mind during upkeep too. If a section feels tight after a few days, loosen it or have it redone instead of waiting it out.
Frequently Asked Questions
How do I make my braids look thicker?
Pancake them: tug the outer loops of each section sideways, one loop at a time, until the braid spreads into a wide, flat ribbon.
Start with a snug braid and lock the end with an elastic, then loosen from the bottom up, since yanking at the crown can pull the whole braid apart.
Added hair is another route to more fullness and length, and it works the same whether you put it in yourself or have a salon do it.
Which hairstyle is good for thick hair?
Large knotless braids and long goddess braids both suit thick hair well. Larger sections leave fewer braids to keep up, and each one reads as a bold, chunky line.
Waist-length goddess braids sit well on thick hair, which holds the weight, and the curled ends soften what could otherwise look like stiff, straight lines.
Tell your braider your hair is dense so the section size matches it, and no scalp peeks through the parts.
How to braid hair with extensions for beginners?
Before braiding, clip the extensions in and brush the whole head smooth so nothing is tangled. You don’t have to blend them in perfectly, since you braid all the hair together.
Work a strong hold gel into large sections as you go. For a first home project, try a bubble braid: tie a ponytail, add small clear elastics down its length, then ease each puffy section outward.
Are jumbo braids heavy?
They can be, because large braids with long extensions add real weight, especially at waist length. Heavy-looking jumbo braids are easier on thick hair, and a knotless start usually feels lighter than a bulky knotted one.
Sore or tugged roots on the first night mean the braids are too tight, so go back and have your braider loosen them.