Placement shapes the look: a High Puff Hairstyle gives height, a Voluminous Side Puff gives asymmetry, and 2 High Puffs give a matched pair.
The list starts with a single gathered High Puff and moves toward Puff with Laid Edges, Curly Puffs with Braids and Puff with Colorful Accessories, and each added detail adds time.
For the least work, go with the High Puff Hairstyle; if you can spare a few extra minutes, 2 High Puffs or Curly Puffs with Braids are worth the effort.
1. High Puff Hairstyle
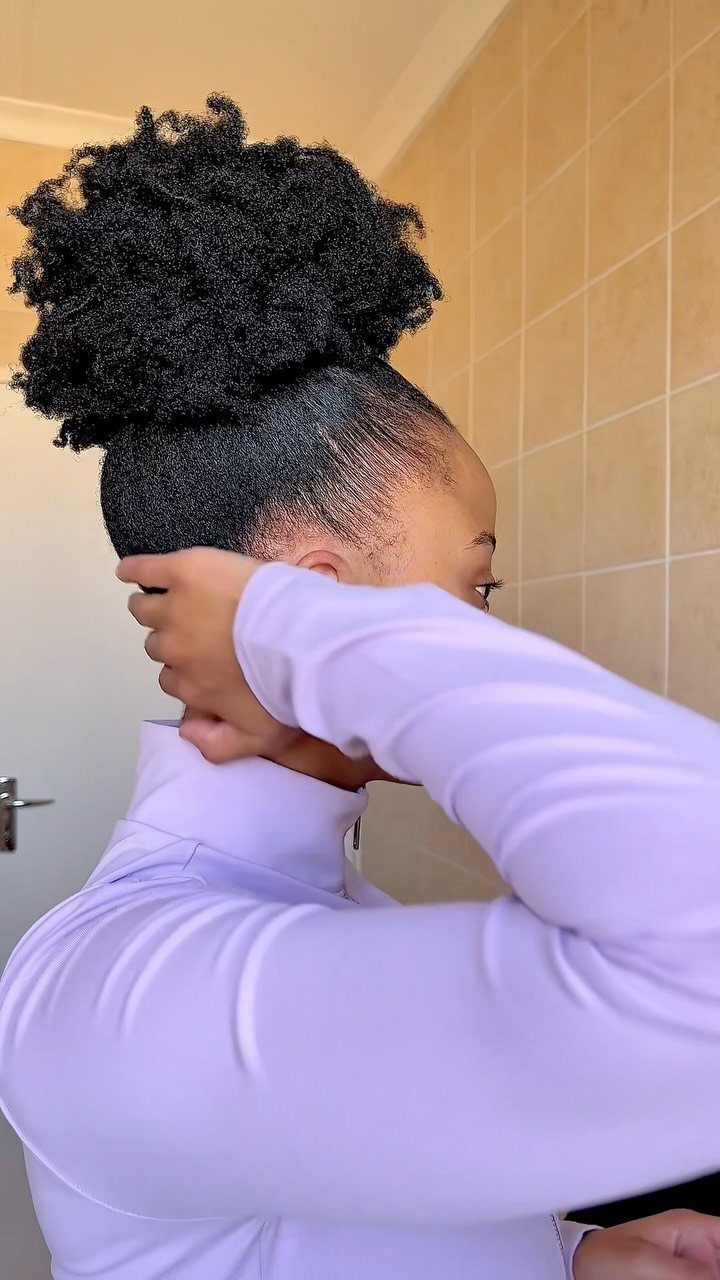
A high puff lives or dies at the crown. Gather the hair there, and the position alone gives you height and a clean line from the side.
Stretched hair holds a fuller shape than shrunken hair, so I’d loosen the curl pattern before gathering. Pick the puff over a low bun if you want length in your profile without extra pieces.
Pat the shape out gently with a pick or fingers instead of pulling it tight.
2. Two High Puffs
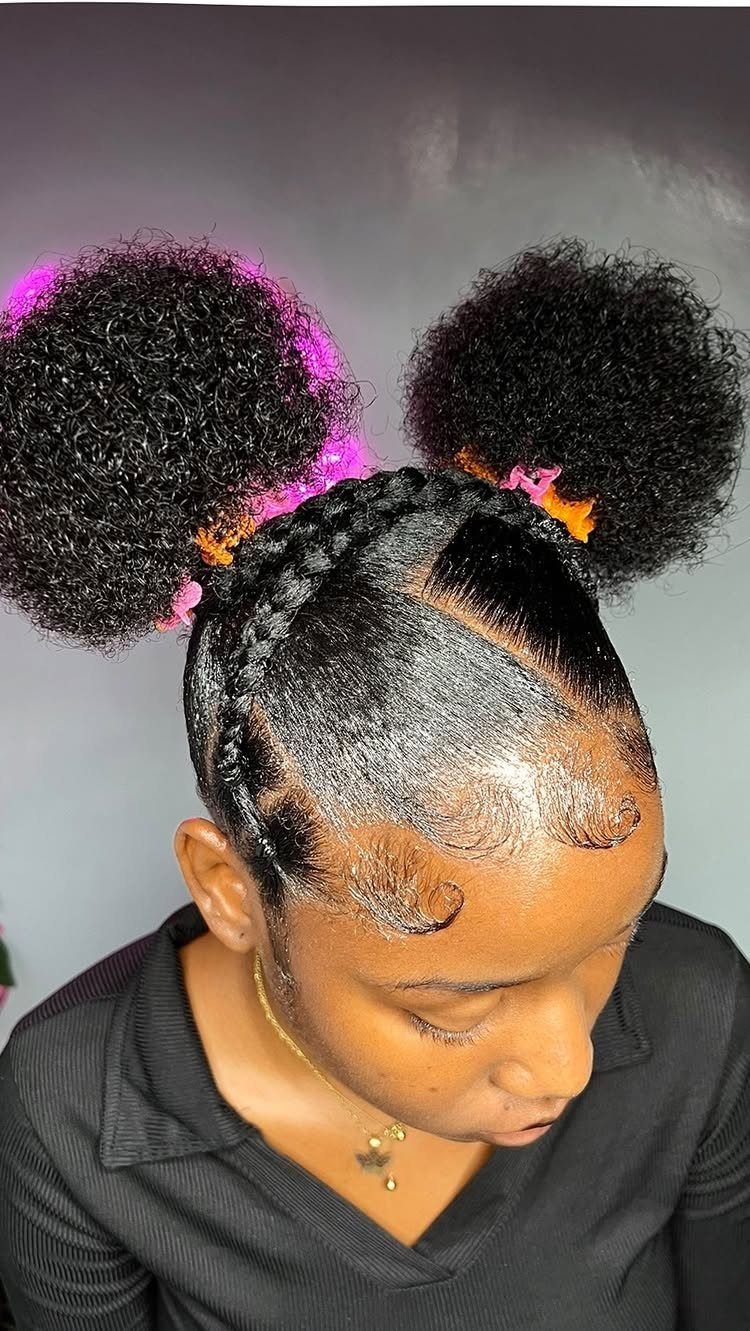
2 puffs only work when they match, so part first. A straight center part is the guide that keeps both sides even.
Divide the hair down the middle, then gather each side at the same height before you secure it. Check the placement in a mirror from the front, since a half inch of difference shows right away.
I like this on someone who wants a braided crown and neat edges to frame the shape. It takes more patience than a single puff, and it’s worth the extra minutes.
3. Bubble Ponytail
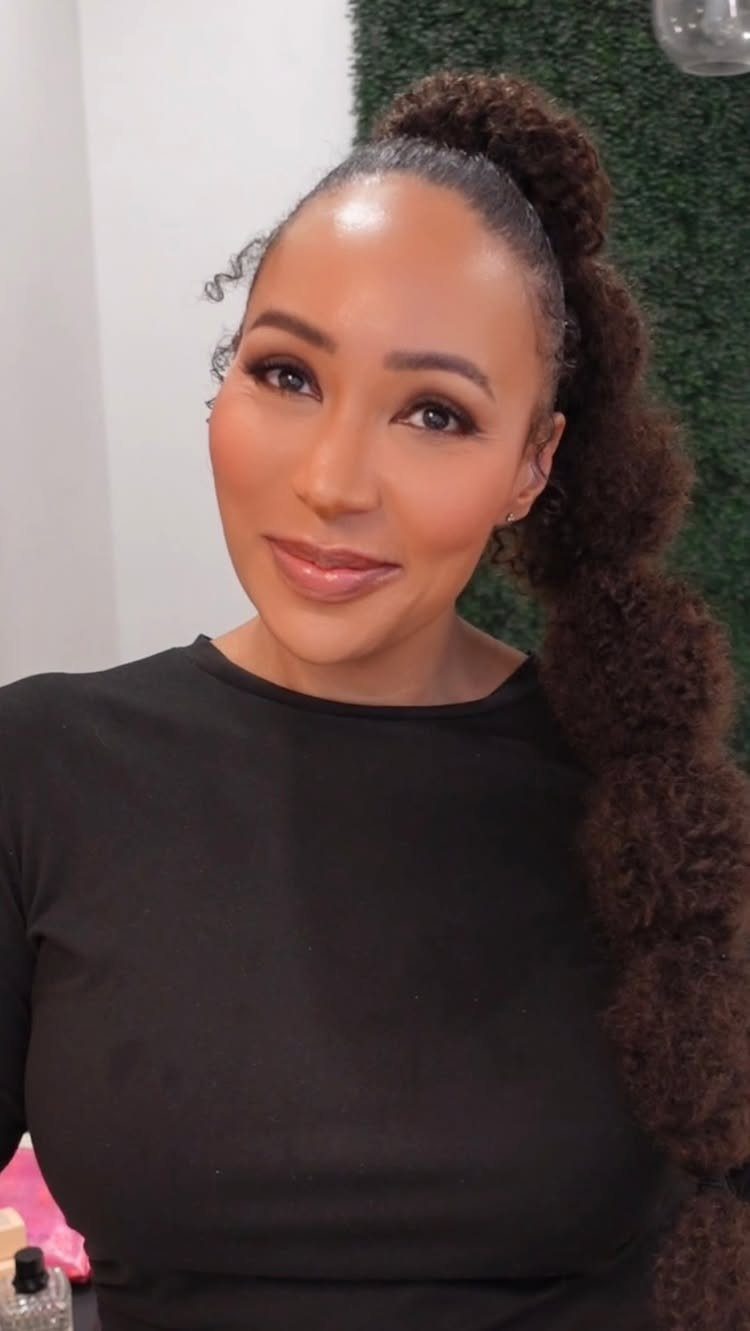
A bubble ponytail is a high puff with a playful twist: the hair is divided into rounded sections along the length of the tail.
Start with a high ponytail, then tie elastics down the tail at even gaps.
Gently pull each section outward so it balloons. Keep the gaps equal, because uneven spacing makes the bubbles look accidental.
Clear or hair-colored elastics keep the focus on the curls. I’d pick this over a plain puff when you want movement and a bit of fun.
4. Puff with Laid Edges
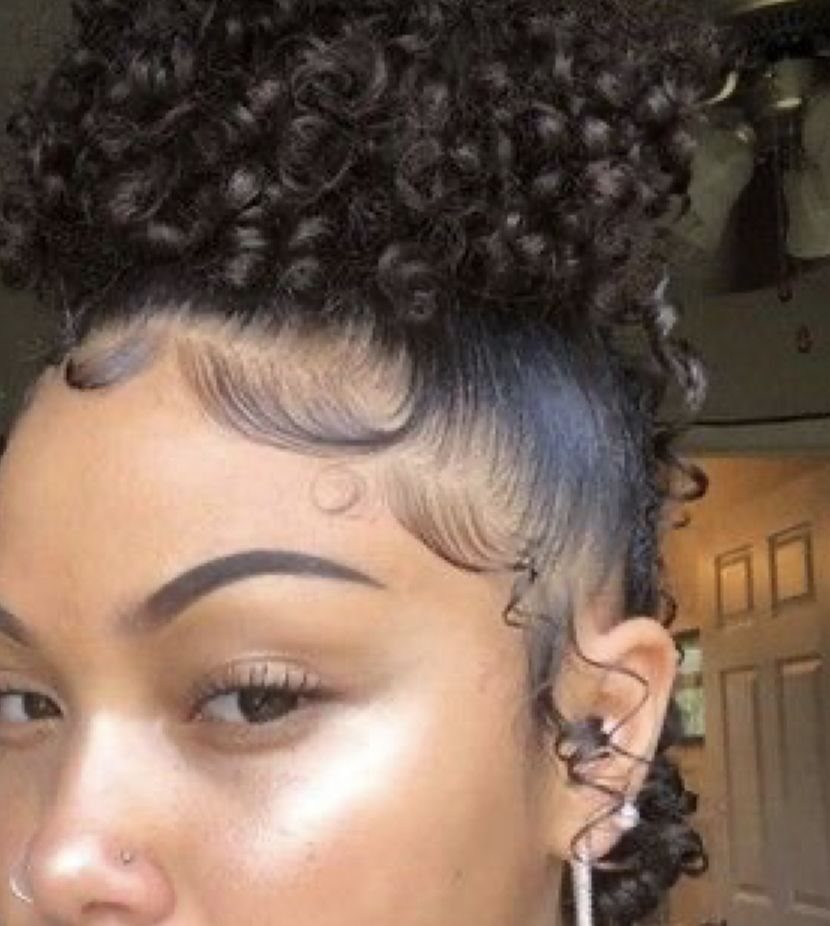
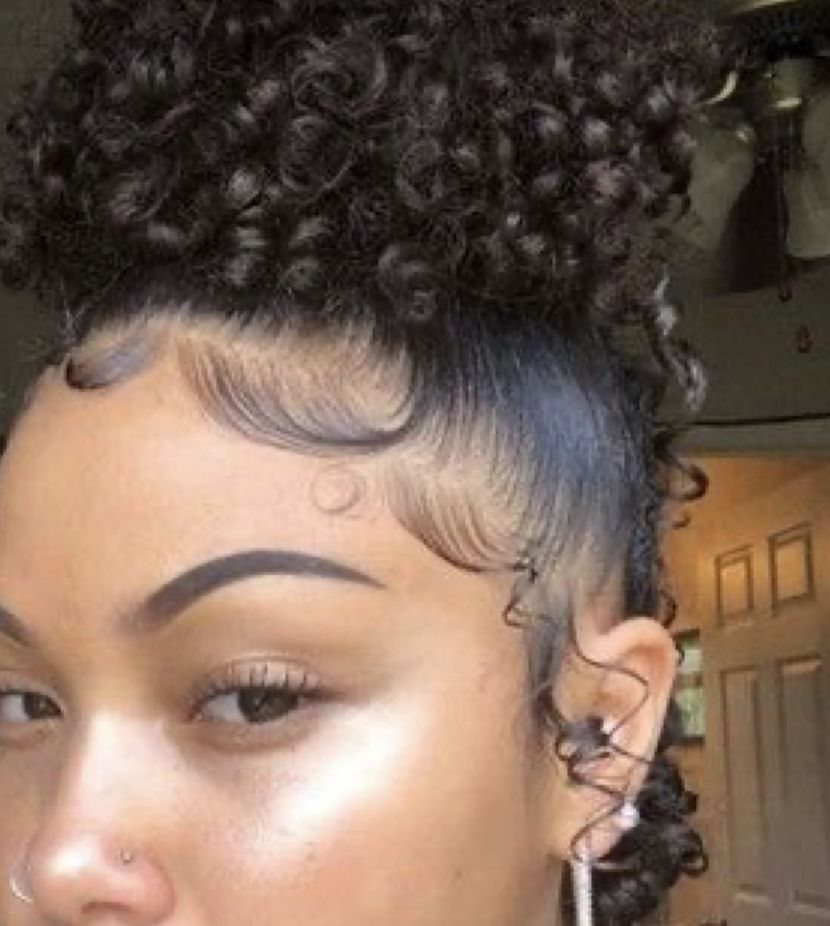
Laid edges are what make a puff look finished. The puff can stay soft and full while the hairline gets smooth and swooped.
Lay the edges after the puff is gathered and secured, so the pulling and smoothing of the setup can’t push them out of place. Use a small brush and shape the hairline in the direction you want it to curve.
I’d choose this for dressier plans, since the contrast between a fluffy crown and a sleek front reads as intentional. The edges need touching up if you plan to wear them for more than a day.
5. Curly Puffs with Braids
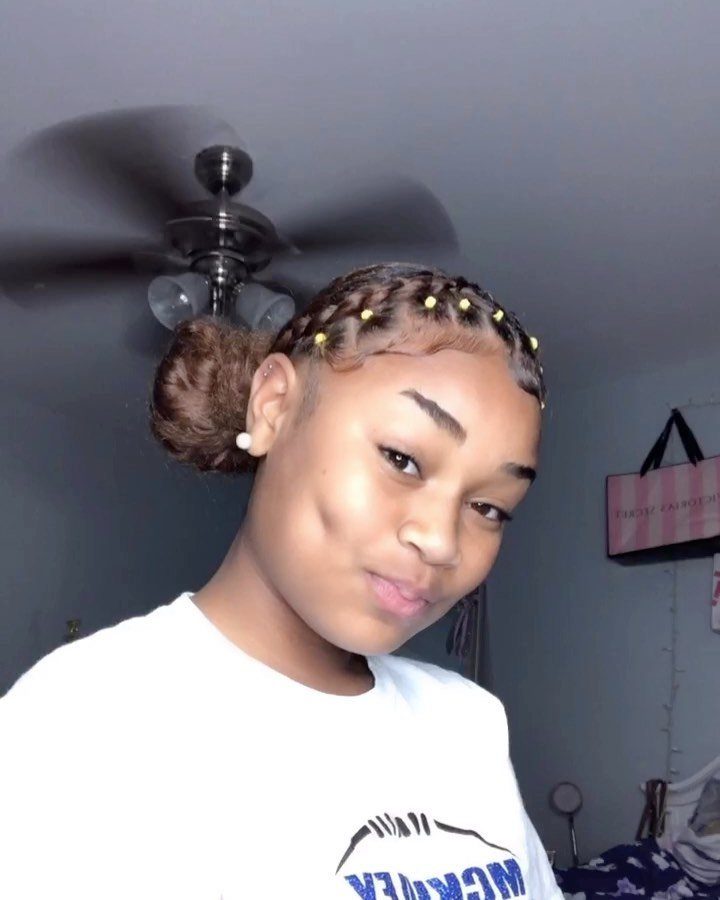
Cornrows give a curly puff structure. The braids sit flat against the scalp, and the curls rise above them, so the 2 textures play off each other.
Braid the sections you want first, ending them at the crown, then gather the loose hair and its braid ends into the puff.
A braided puff gives you extra detail in one style, so it beats a plain puff on days you want something more finished.
6. Voluminous Side Puff
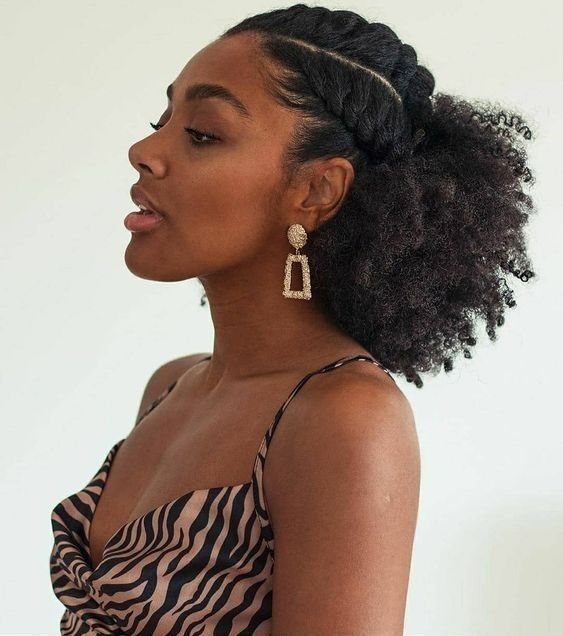
Moving the puff to one side changes the whole balance of the face. It creates an asymmetry that looks styled, even when the technique is simple.
Gather the hair low on one side, around ear level, and secure it before fluffing the shape out.
Twisting the scalp hair first keeps the top neat and gives the puff a base to sit on, so it holds its height longer.
Earrings on the exposed side show off the neckline. I’d try this when a center puff feels too expected.
7. Natural Hair Puff Bun
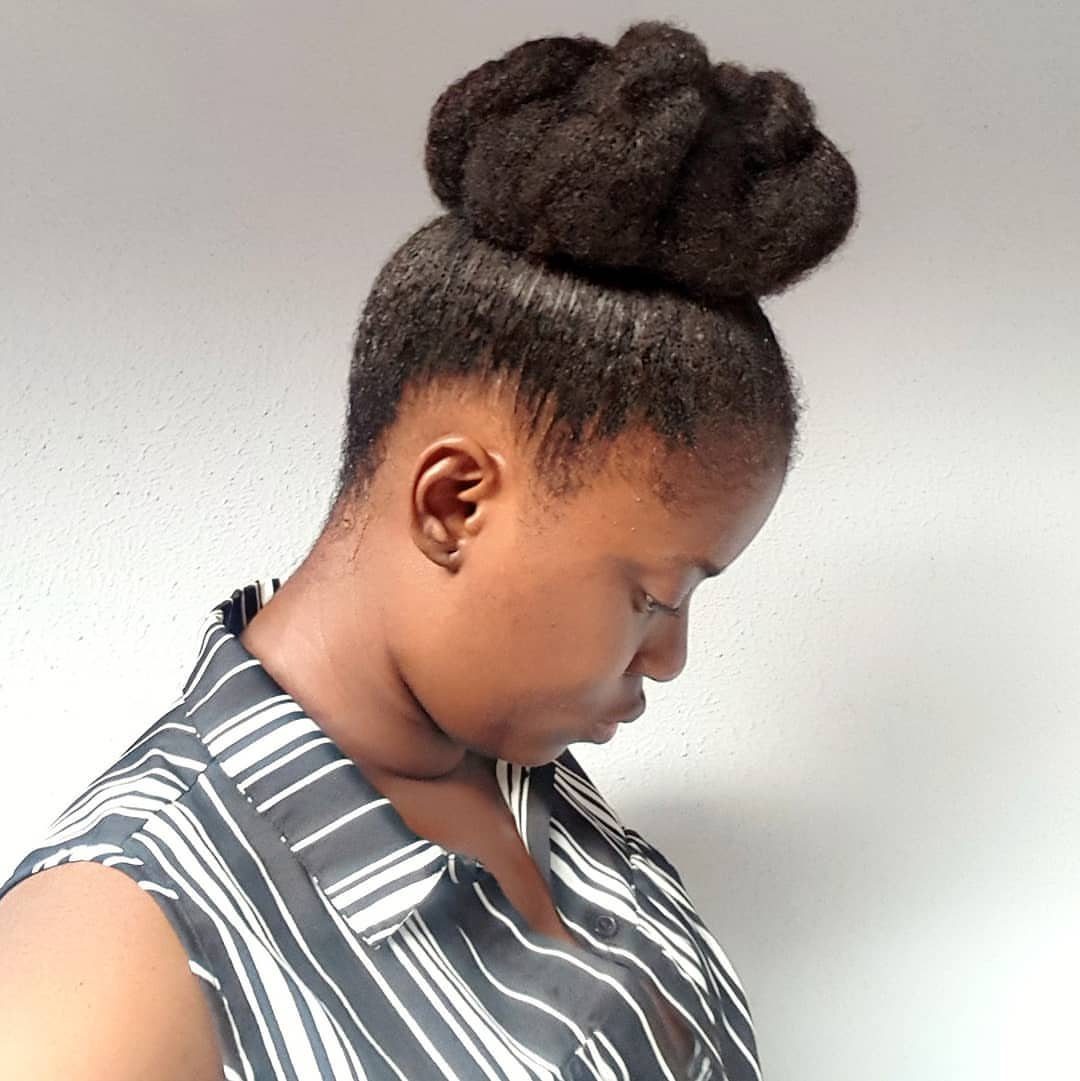
A puff bun is a gathered puff worn as a bun: the hair is pulled up and left soft and full instead of wrapped tight.
It sits between a puff and a bun, which is why it works for both casual days and dressier ones.
Gather the hair at the crown, secure it, then fluff the shape with your fingers until it looks rounded and even from the side. A larger bun suits a plain top and bare shoulders, since nothing competes with the outline.
I’d pick this over a standard puff when you want the shape to feel more contained.
8. Puff with Colorful Accessories
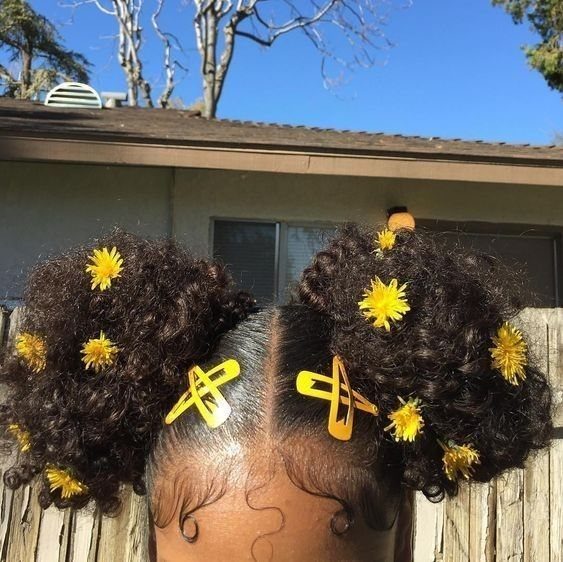
Accessories are what turn a puff into a styled look. 2 high puffs give you plenty of room to place flowers or clips, and a single color keeps the result cohesive.
Finish the puffs first, then add the pieces.
Clips go in last, pushed in at the base or along the curve, so you can judge the shape before you decorate it. Spacing them unevenly looks more natural than lining them up.
I’d stick with one or two colors. Past that, the accessories start to fight the curls.
Tips for Maintaining Puffs
Moisture decides how a puff looks on day 3 and how the hair feels on day 30. Keep the strands moisturized, and rotate in protective styles so the ends aren’t handled every day.
Regular trims help prevent split ends, which snag on elastics and frizz the outline of any puff. Book them on a schedule instead of waiting until the ends look rough.
Sleeping in a loose, covered style keeps the shape from flattening and cuts down on morning rework. A satin bonnet or scarf does that job well.
Styling Products for Puffs
Edge control gel is the product that gets you sleek edges. Start with a dab about the size of a dime, then smooth it through with a brush, since a heavy hand leaves flakes and a tacky feel.
Hair ties do the securing. Choose a snag-free kind, and a black elastic headband is a good option when you want to hold the hairline in place while the gel sets.
Curl cream is worth considering for definition. Work it through damp hair before you gather the puff, so the curls stay clumped and soft instead of dry and fuzzy.
Occasions for Puff Hairstyles
A puff adapts to the day, which is its best quality. For casual outings, leave it soft and full with nothing added.
For formal events, tidy the edges and add a clean accessory. For everyday wear, a quick gather at the crown takes little time and still looks put together.
Puffs also suit kids, and twin puffs are an easy place to start. Keep the ties gentle on small scalps.
A side-placed puff is a good option when you want something dressier than a center one.
Frequently Asked Questions
How to make puffy hair look good?
Pull everything up to the crown and secure it there; the higher anchor adds inches of height and leaves a clean outline from the side.
Stretch the curls before you style, by blow-drying on low heat or twisting overnight, because shrunken coils collapse while stretched hair holds volume.
To shape it, lift and pat the hair outward with a pick or your fingertips rather than tugging it tight, and run edge control along the hairline for a sleek frame.
What is a good hairstyle for natural hair?
A puff is one of my top picks, because it shows off the curls and takes little time. If you want more detail, cornrows under the puff or laid edges at the front make it look more finished.
Does puff puff hairstyle grow hair?
A puff doesn’t make hair grow faster, but it can help you keep the length you have.
Gentle handling matters most, so rotate in protective styles and keep the strands moisturized. Trimming every 8–12 weeks also keeps split ends from catching on the elastic and roughing up the puff’s edge.